Why Is My Boxwood Turning Yellow? 5 Causes & Quick Fixes
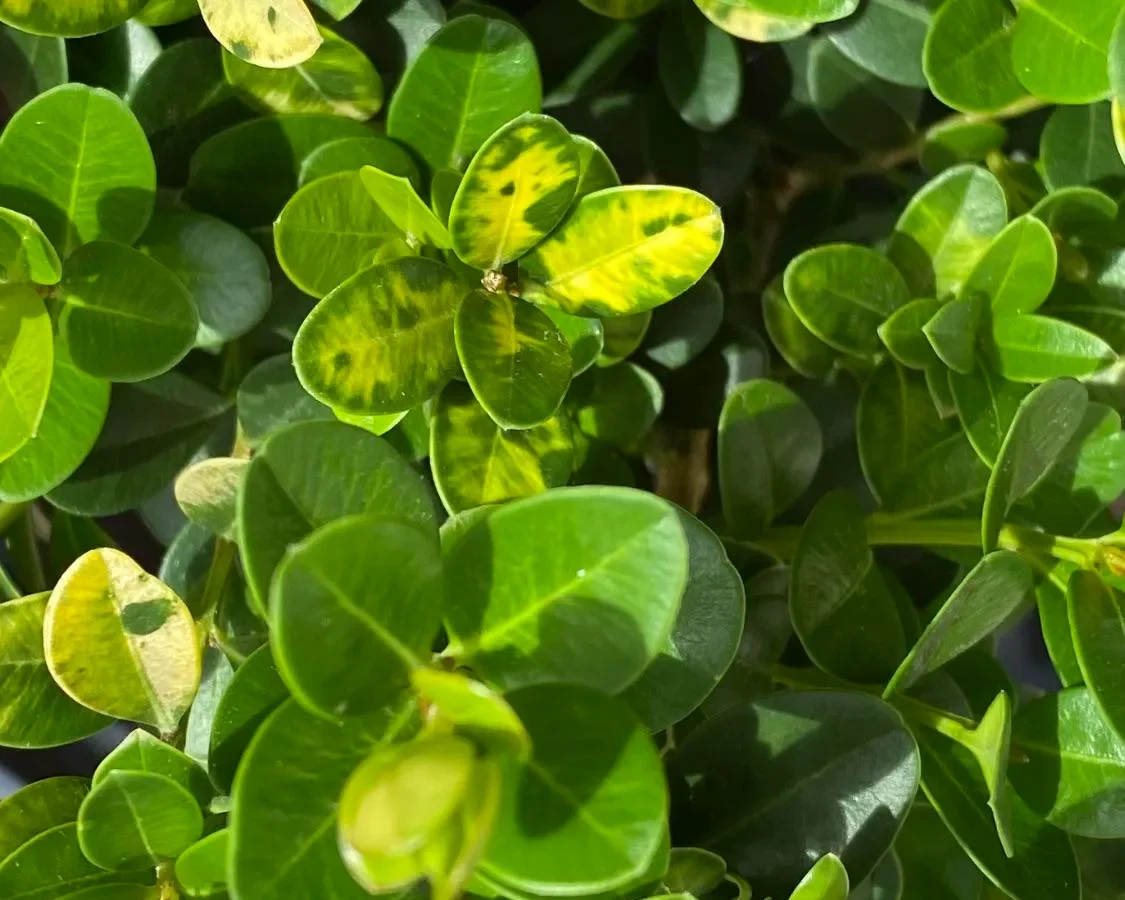
If you're standing in your yard thinking "my boxwood is turning yellow," you aren't alone. That sudden color shift usually points to a specific stressor rather than random bad luck. Boxwoods have shallow, fibrous root systems that react fast to changes in their environment.
Figuring out the exact cause is the only way to save the shrub.
Our research into plant pathology shows most yellowing cases tie back to soil moisture or nutrient lockout. Boxwoods need a soil pH between 6.5 and 7.0 to absorb nutrients properly. Anything outside that narrow window starves the plant even if you fertilize regularly.
Let's walk through exactly how to figure out what is happening in your yard.
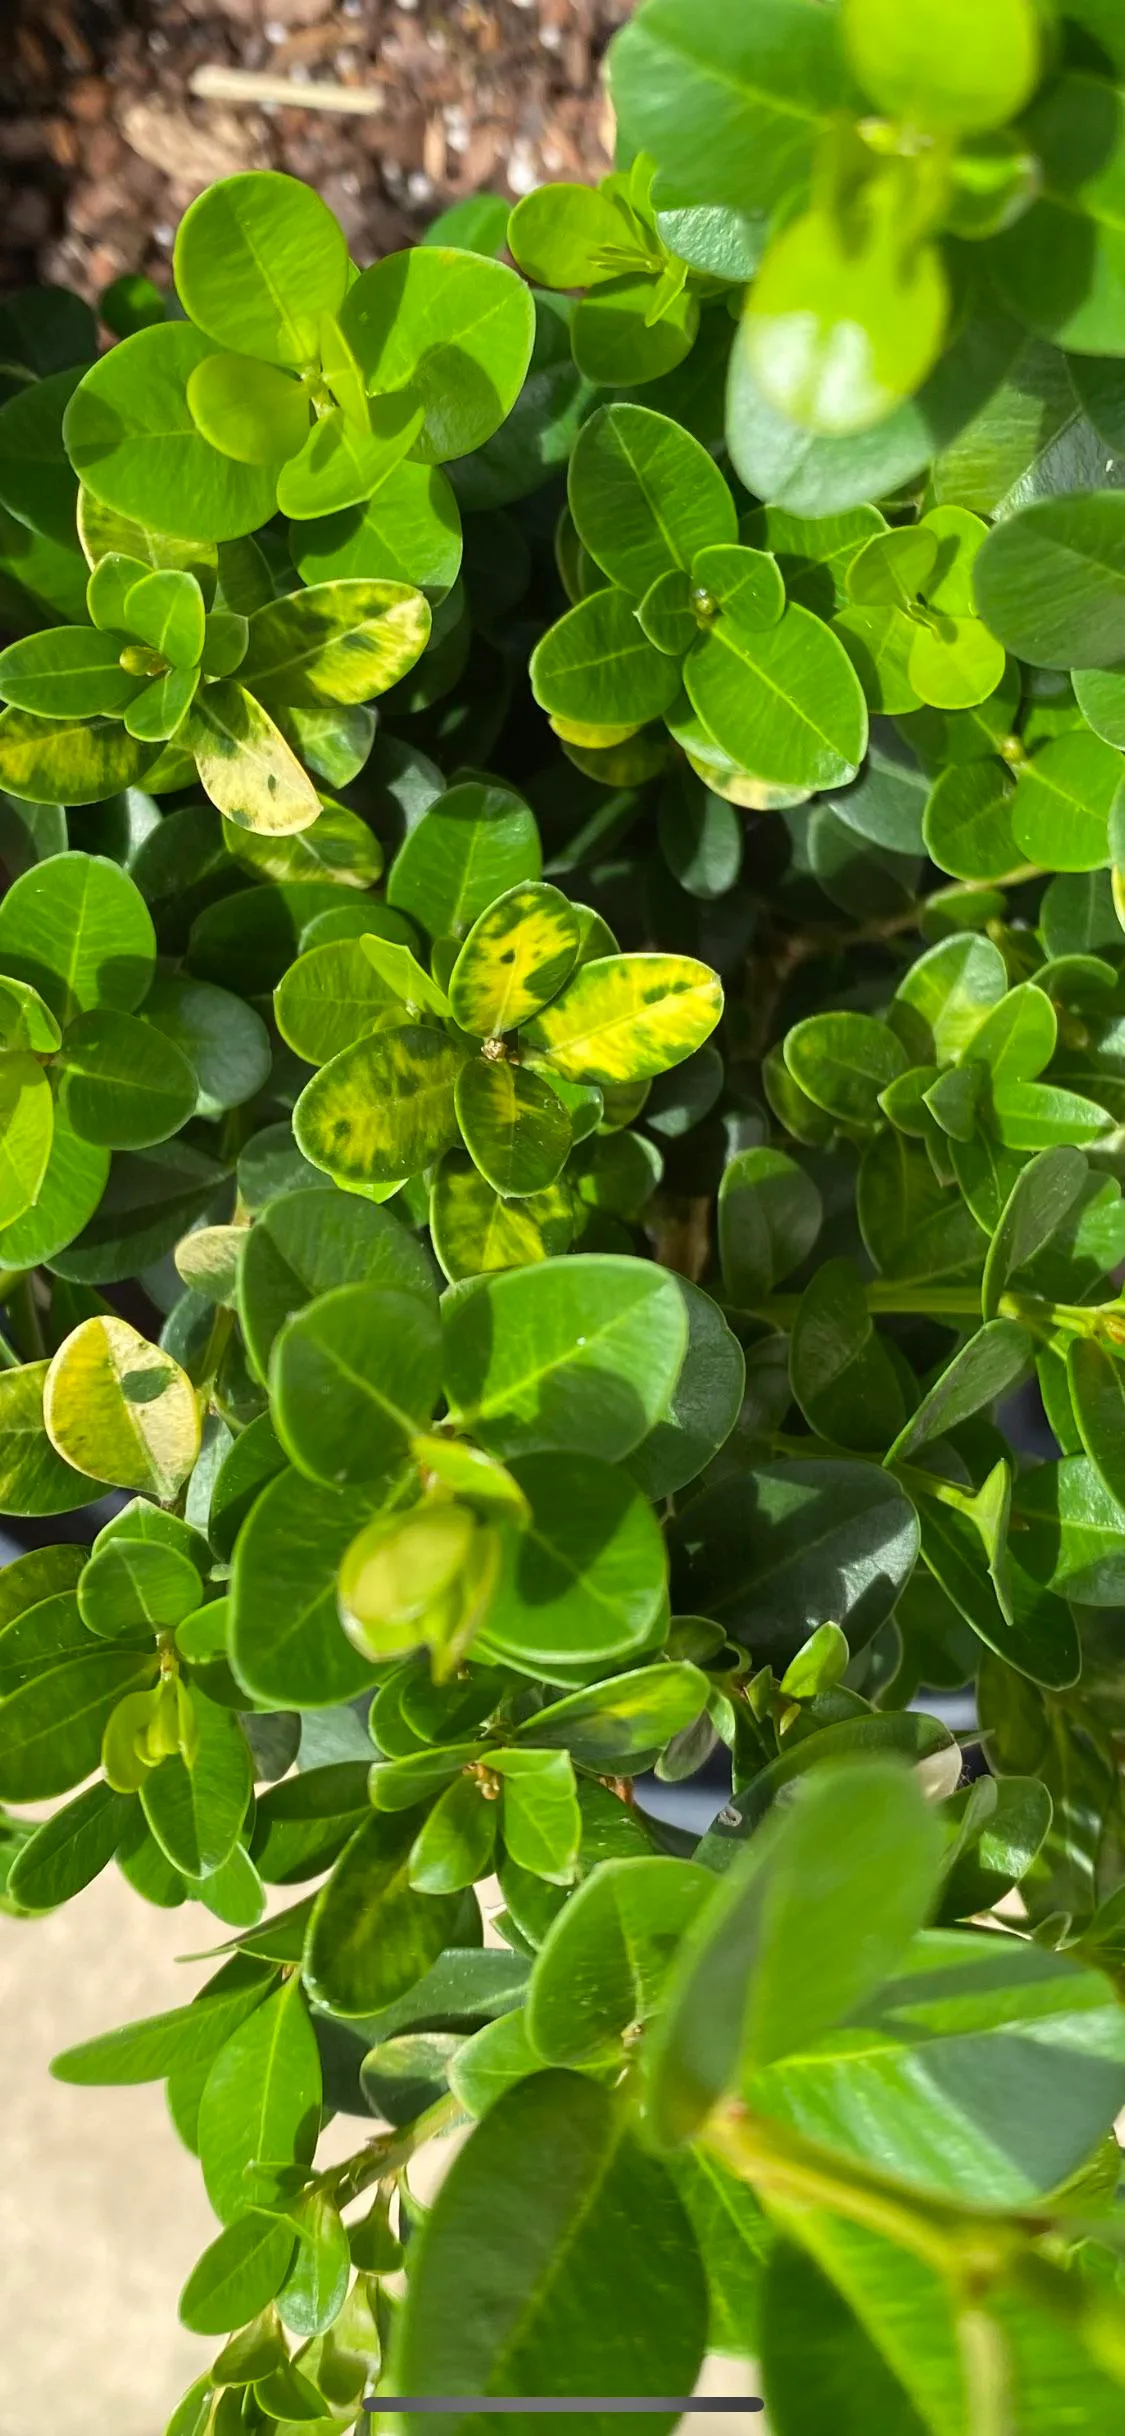
Image source: Bing (Web (fair-use with source credit))
Quick Answer
A boxwood turning yellow signals environmental stress or disease. Overwatering and poor drainage are the most common causes. Nutrient deficiencies also trigger leaf chlorosis quickly.
Check your soil moisture and pH levels first. Correcting these factors usually restores green foliage.
Why Your Boxwood Is Turning Yellow (And How to Read the Leaves)
Yellow leaves on a boxwood act like a warning light on your dashboard. The pattern of that yellowing tells you exactly where the problem lives. You just have to know what to look for before grabbing fertilizer or pruning shears.
If the older interior leaves turn pale while new tips stay green, the plant likely lacks nitrogen. Nitrogen deficiency forces the shrub to pull resources from old growth to support fresh shoots. That creates a very distinct two-toned look across the hedge.
Iron chlorosis looks completely different. New growth emerges pale yellow while the leaf veins stay dark green. This happens when alkaline soil traps iron so roots cannot absorb it.
Adding more standard fertilizer won't fix this specific issue at all.
Winter burn hits the outer foliage facing prevailing winds. The leaves turn bronze or yellow because frozen ground prevents roots from replacing lost moisture. Spring sun accelerates that water loss rapidly.
Damage usually stays confined to one side of the plant.
Sometimes normal spring shedding mimics a problem. Boxwoods naturally drop their oldest interior leaves every few years. If the yellowing is sparse and deep inside the canopy, relax.
That is just routine housekeeping by the plant itself.
The Diagnostic Workflow: Pinpointing the Exact Cause
Fixing a sick boxwood requires following a strict diagnostic path. Guessing leads to wasted money and dead plants. We use a simple three-step workflow to isolate the real culprit every single time.
Start by observing the timing and weather conditions. Did the yellowing appear after a heavy rain week? That points toward waterlogging.
Did it happen right after a hard freeze? You are likely looking at cold injury.
Next, examine the physical structure of the plant closely. Look at the stems, the bark, and the base of the trunk. Peeling back the mulch often reveals hidden problems immediately.
Fungal issues leave distinct physical marks you can spot without a lab.
Finally, get your hands dirty and check the root zone. Soil conditions dictate everything for these shallow-rooted evergreens. A quick physical inspection answers more questions than any spray bottle will.
Follow these branches to find your exact match.
| Symptom Pattern | Most Likely Cause | First Action Step |
|---|---|---|
| Whole plant wilting, yellowing | Root rot or drought | Dig up a small root sample |
| Veins green, new leaves yellow | Iron chlorosis | Test soil pH immediately |
| Outer leaves scorched, one side | Winter burn | Wait for spring flush |
| Spotty yellow with tiny trails | Leafminer insects | Inspect leaves against light |
| Older leaves fading uniformly | Nitrogen deficiency | Apply balanced slow-release feed |
Branch 1: Which Leaves Are Yellow and When Did It Start?
The location of the yellow leaves is your first major clue. If only the newest growth at the branch tips turns yellow, suspect a nutrient lockout. High soil pH prevents roots from taking up iron or manganese.
Test your soil before doing anything else.
If the entire shrub yellows uniformly and starts dropping leaves, think about water. Both too much and too little water cause this exact symptom. You need to feel the soil six inches down to know which extreme you face.
Timing matters just as much as placement. Sudden yellowing in late summer often points to nematode damage. These microscopic worms attack roots when soil temperatures peak.
The plant slowly starves despite adequate watering.
Yellowing that creeps in gradually over several months suggests a chronic issue. Compacted soil or planting the shrub too deep suffocates roots slowly. The root flare must sit half an inch above the surrounding grade.
Buried trunks guarantee long-term decline.
Branch 2: What Do the Roots and Soil Look Like?
Roots tell the true story of your boxwood's health. Grab a trowel and gently dig near the drip line. Healthy roots are firm, light-colored, and spread outward evenly.
They smell like fresh earth.
If the roots are dark brown, mushy, or falling apart, you have Phytophthora root rot. This fungal pathogen thrives in heavy clay or waterlogged beds. It destroys the root system faster than the plant can recover.
Overwatering makes this significantly worse.
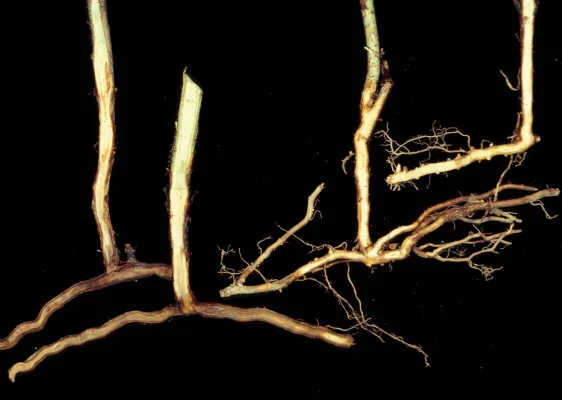
Image source: Bing (Web (fair-use with source credit))
Dry, brittle, wiry roots mean severe drought stress. Boxwoods need about one inch of water per week during active growth. Shallow daily sprinkling encourages weak surface roots that bake in summer heat.
Deep, infrequent watering builds resilience.
Check your mulch depth while you are down there. Mulch volcanoes piled against the trunk hold excess moisture directly on the bark. Keep organic mulch limited to two or three inches deep.
Pull it back a full two inches from the main stem.
Soil compaction is another silent killer. Urban landscapes suffer heavily from foot traffic and equipment weight around foundation plantings. Compacted soil pushes oxygen out entirely.
Roots suffocate and turn yellow within weeks. Core aerating the bed helps restore airflow.
Branch 3: Are There Pests, Spots, or Lesions?
Look closely at the leaves themselves if roots seem fine. Hold a yellowing leaf up to the sunlight. If you see winding translucent trails inside the tissue, boxwood leafminers are feeding there.
The larvae live between the leaf surfaces.
Small orange or yellow stippling on the upper leaf surface confirms spider mites. They thrive in hot, dusty conditions during midsummer. Tap a branch over white paper to see them move.
Heavy infestations drain the life out of foliage quickly.
Dark lesions on the stems combined with rapid defoliation signal boxwood blight. This fungal disease spreads aggressively in warm, humid weather. It causes black streaks on green stems before leaves drop entirely.
University extension programs track this pathogen closely across affected states.
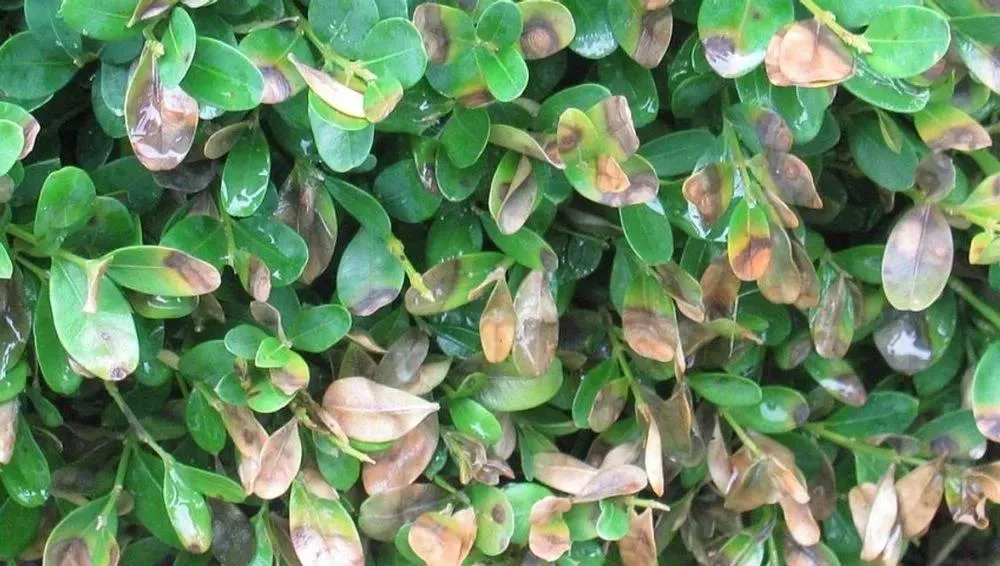
Image source: Bing (Web (fair-use with source credit))
Volutella blight presents differently. It turns leaves salmon-pink or tan rather than bright yellow. You will notice fuzzy spore masses under wet conditions.
Pruning out dead wood during dry weather limits its spread.
Don't forget non-biological damage either. Dog urine burns lower branches, creating distinct yellow and brown spotting. Salt runoff from winter sidewalks causes similar localized scorching.
Rule out environmental factors before treating for complex diseases.
Matching the Symptom to the Right Fix
Once you identify the exact cause through the workflow above, apply the targeted solution. Throwing generic treatments at a specific problem wastes time. Worse, it often accelerates the plant's decline permanently.
For root rot caused by Phytophthora, stop watering immediately. Improve drainage by amending heavy clay beds with pine bark. Severely infected plants rarely survive and should be removed.
Never replant another boxwood in that exact same hole.
Iron chlorosis requires lowering the soil pH back to the 6.5 range. Apply elemental sulfur or a specialized acidifying fertilizer based on your soil test results. Chelated iron sprays offer a temporary green-up while the soil chemistry corrects itself.
Patience is required here.
Winter burn needs no chemical intervention at all. Leave the damaged foliage alone until new spring growth emerges fully. Premature pruning exposes tender inner branches to late frosts.
Anti-desiccant sprays applied in late fall prevent future occurrences.
Leafminers require precise timing for control. Systemic insecticides work best when applied right after adult flies lay eggs in spring. Contact your local cooperative extension for exact emergence dates in your zip code.
Missing the window renders treatment useless.
Nitrogen deficiency responds well to a balanced, slow-release granular fertilizer. Apply it in early spring just before the growth flush begins. Avoid cheap synthetic salts that burn shallow roots.
Organic options like composted cottonseed meal feed the soil biology simultaneously.
Nematode damage has no easy chemical cure for home gardeners. Focus on keeping the plant vigorously healthy to tolerate the pest load. Deep mulching and consistent moisture reduce environmental stress.
Severely stunted specimens are better replaced with resistant alternatives like Japanese holly.
Always sanitize your pruning tools between cuts. Use a ten percent bleach solution or seventy percent isopropyl alcohol. Moving from a diseased shrub to a healthy one transfers fungal spores instantly.
Clean tools are your cheapest insurance policy.
Common Mistakes That Kill Boxwoods Faster Than the Problem
Panic drives terrible gardening decisions. We see homeowners destroy salvageable boxwoods constantly because they rush the wrong fix. Avoiding these errors keeps your hedge alive while you solve the actual issue.
Adding fertilizer to a drowning plant is the number one mistake. If root rot causes the yellowing, pushing new top growth stresses the remaining roots further. The plant collapses entirely within days.
Diagnose moisture levels before opening any fertilizer bags.
Overhead irrigation invites disaster for evergreen broadleaves. Water sitting on foliage overnight creates perfect conditions for boxwood blight. Always water at the base using drip lines or soaker hoses.
Keep the leaves completely dry whenever possible.
Planting too deep guarantees a slow death. Nursery containers often settle, hiding the true root flare. When you transplant, ensure the topmost roots sit slightly above grade.
Soil piled against the bark rots the crown eventually.
Ignoring quarantine rules spreads devastating diseases. As of 2026, several US states maintain strict regulations regarding boxwood blight movement. Bagging and landfilling infected material is mandatory.
Never toss diseased clippings into your backyard compost pile.
Applying iron chelates without testing soil pH first wastes money. If your soil sits at 8.0, the added iron locks up immediately anyway. The expensive amendment does absolutely nothing for the plant.
A basic university lab soil test costs very little and saves massive frustration.
Pruning during wet weather spreads Volutella and other fungi. Spores splash from open wounds onto healthy tissue easily. Wait for a string of dry, sunny days before making cuts.
Timing your maintenance protects the rest of the hedge.
Misidentifying normal spring shedding as a disease leads to unnecessary chemical applications. Boxwoods drop old interior leaves routinely. If the exterior canopy remains dense and green, put the spray bottle away.
Observation prevents overtreatment every single time.