How to Propagate Alocasia Mickey Mouse Easily
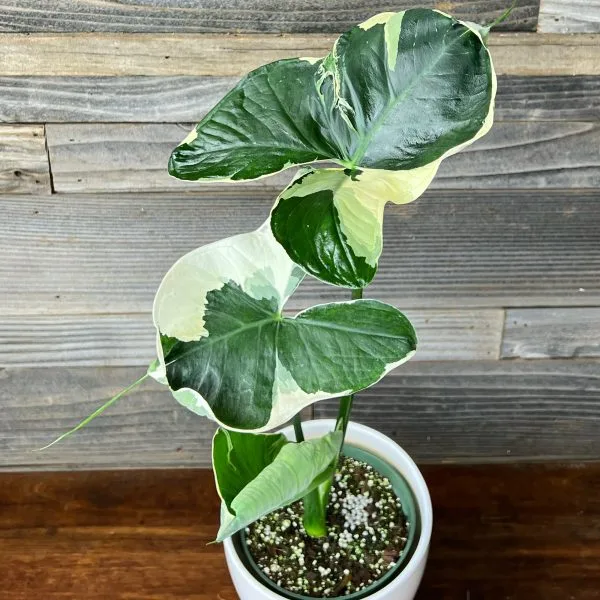
If you are researching alocasia mickey mouse propagation, you need to know one thing right away. You cannot root this plant from a leaf or stem cutting in water. This species grows from underground storage organs called corms.
Any attempt to propagate it like a standard pothos will just leave you with rotting plant tissue.
Image source: Web (Bing) / planthawaii.com (Web image (fair-use with source credit))
Botanically, this plant is actually Xanthosoma albo-marginatum 'Monstrosum'. The houseplant trade frequently mislabels it as an Alocasia. Our research into tropical tuberous plants confirms that successful multiplication requires either dividing basal offsets or sprouting dormant corms at 75°F to 80°F.
Let us look at exactly how to handle both methods safely.
Quick Answer
Alocasia mickey mouse propagation requires corms or basal offsets.
You cannot propagate this plant from leaf cuttings.
Divide attached pups during spring or early summer.
Sprout dormant corms using damp sphagnum moss.
Always provide bottom heat for reliable root growth.
Why Your Alocasia Mickey Mouse Won’t Root in Water (The Corm Reality)
Most houseplant owners assume every plant roots in a glass of water. That works perfectly for vining aroids with visible nodes along their stems. The Mickey Mouse plant does not work that way.
It belongs to a group of tuberous plants that store energy underground.
This plant grows from a thick, bulb-like structure called a corm. Leaves push up directly from this corm. They do not have independent rooting nodes on the petioles.
If you snip off a leaf and submerge the stem, it will turn to mush. Bacterial soft rot takes over within days.
In our research across university extension resources, such as those provided by UF/IFAS Extension, tuberous aroids require specialized handling. You must preserve the corm tissue to generate new roots. The International Aroid Society also emphasizes that division and corm harvesting are the only reliable home methods.
Think of the corm as a battery. It holds all the moisture and nutrients the plant needs to start fresh. Without that battery attached, a severed leaf has zero fuel.
You have to work with the underground anatomy if you want new plants.
Stop trying to force water propagation on a plant built for soil. Understanding this single fact saves you months of frustration. Now we can figure out which actual method your plant supports.
Inspect the Base: Deciding Between Offset Division and Dormant Corms
Your next step depends entirely on what your mother plant is doing right now. You need to unpot the plant gently to see the base. Tip the nursery pot sideways and slide the root ball out.
Wash away the old soil with lukewarm water so you can see clearly.
Once the roots are exposed, look for specific structures. You are searching for either baby plants or hard brown spheres. Here is how to decide your path based on what you find.
- Condition A: You see smaller green shoots growing beside the main stem. These are basal offsets, often called pups. If they have their own roots and a piece of corm attached, use offset division.
- Condition B: You find firm, round, brown objects mixed in the roots. These are dormant corms. If there are no green pups yet, use the sphagnum moss sprouting method.
- Condition C: You see neither pups nor extra corms. Put the plant back in its pot. It needs more time, warmth, and light before it will multiply.
Offset division is much faster. You get a fully formed baby plant immediately. Sprouting dormant corms takes about four to eight weeks of careful monitoring.
Both methods work well if you match them to the right condition.
Never divide a plant that is actively yellowing or dropping leaves for winter. Wait until spring when temperatures stay reliably above 65°F. Active growth energy is required for the plant to heal the cuts.
Path 1: Dividing Basal Offsets With Attached Corm Tissue
If your inspection revealed healthy pups, division is your best option. This method gives you an established baby plant right away. Success depends on keeping corm tissue attached to the offset.
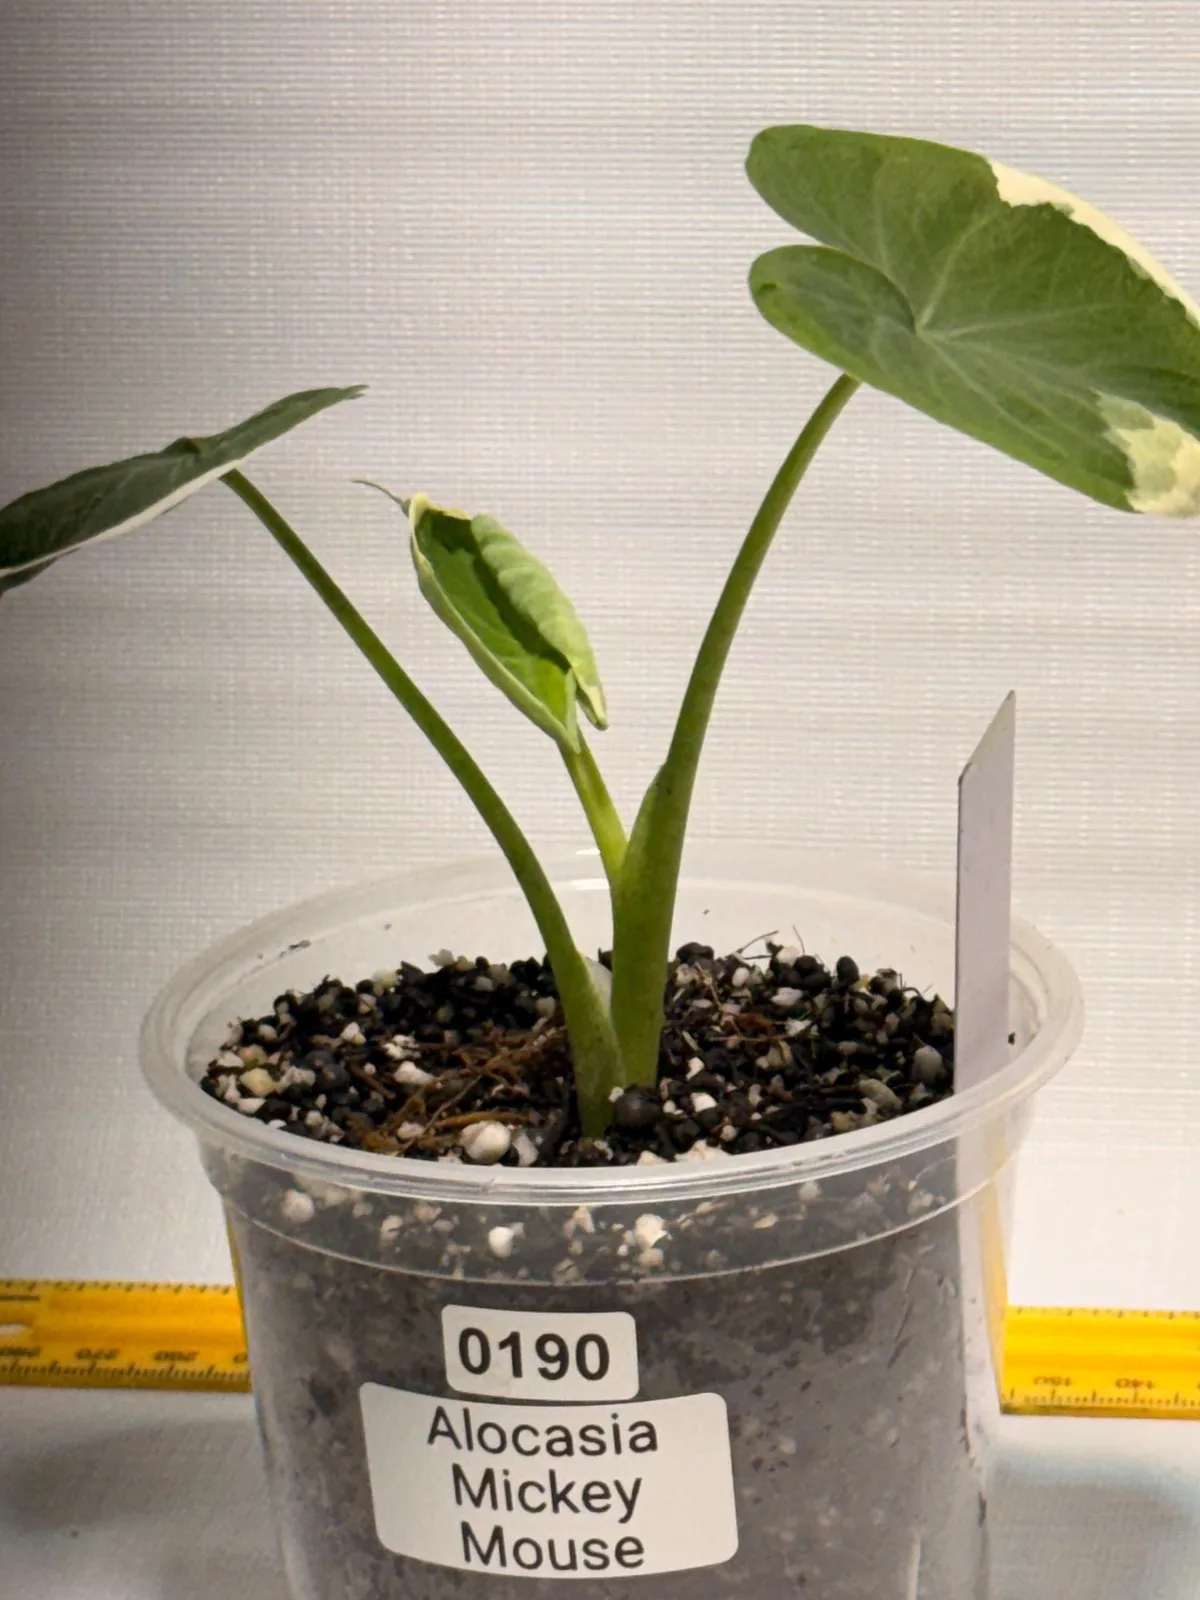
Image source: Web (Bing) / etsy.com (Web image (fair-use with source credit))
Here is the exact workflow we recommend based on aggregate horticultural practices.
Tools and Materials Needed
| Item | Purpose |
|---|---|
| Sharp scalpel or knife | Making clean cuts through tough rhizomes |
| Isopropyl alcohol (70%) | Sterilizing the blade to prevent infection |
| Ground cinnamon powder | Dusting wounds to deter fungal growth |
| Chunky aroid mix | Providing oxygen to recovering tuberous roots |
| Small nursery pots | Preventing excess wet soil around small roots |
Step-by-Step Process
- Sterilize your blade. Wipe your knife thoroughly with rubbing alcohol. Do this before every single cut. Unclean tools spread bacterial pathogens rapidly.
- Locate the connection point. Find the thick rhizome bridge linking the pup to the mother corm. Trace it carefully with your fingers under running water.
- Sever the offset cleanly. Cut through the rhizome bridge with one confident motion. Ensure the pup retains a solid chunk of its own corm base. A pup without underlying corm tissue usually fails to establish.
- Treat the open wounds. Dust ground cinnamon generously over the cut surfaces on both plants. This acts as a natural drying agent and mild fungicide. Let the cuts sit in the open air for about two hours to callus.
- Pot the new division. Fill a snug nursery pot with your chunky aroid mix. Plant the pup just deep enough to keep it upright. Press the soil gently around the base.
- Water very lightly. Mist the soil surface instead of soaking it. The corm already holds plenty of internal moisture. Heavy watering right now invites rot.
Keep the newly potted offset in bright, indirect light. Avoid direct sun while the root system recovers from the shock. Hold off on any liquid fertilizer for at least four to six weeks.
Fertilizer salts burn fragile new roots quickly.
Path 2: Sprouting Dormant Xanthosoma Corms in Sphagnum Moss
Sometimes you will not find green pups during repotting. Instead, you discover hard, brown, bulb-like structures buried in the substrate. These are dormant corms, and they are basically sleeping plants waiting for the right signal.
Do not throw them away thinking they are rocks or dead debris. As of 2026, variegated Xanthosoma cultivars remain highly sought after by collectors. Every viable corm represents a potential new plant.
You just need to wake them up using controlled moisture and heat.
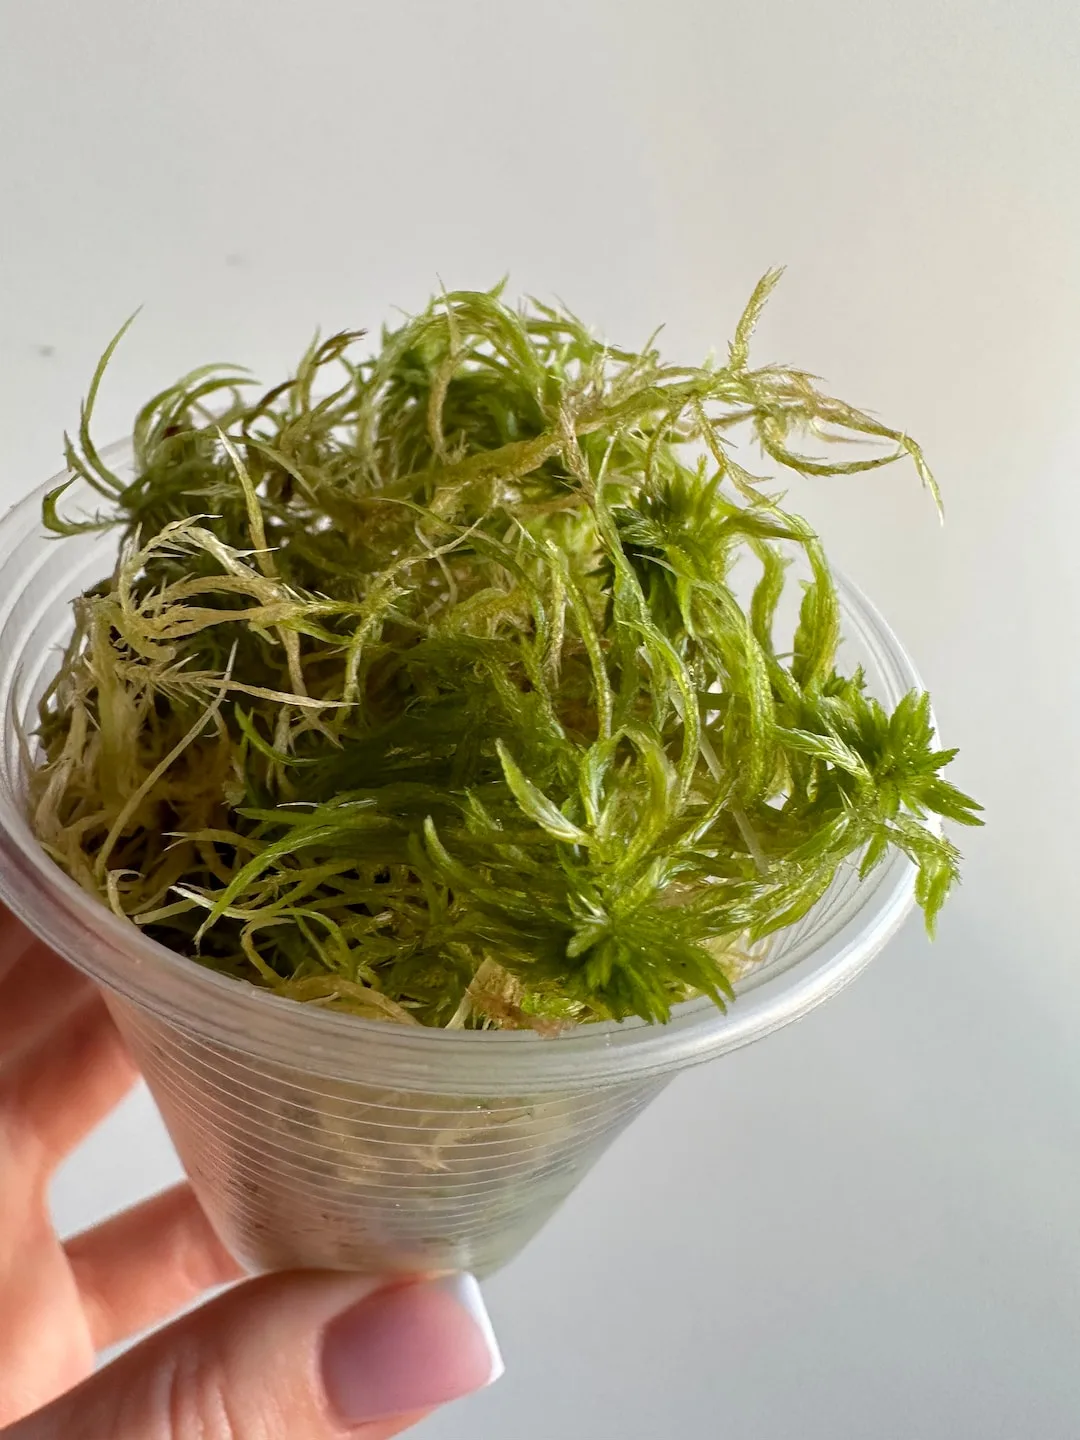
Image source: Web (Bing) / etsy.com (Web image (fair-use with source credit))
Direct potting in heavy soil usually rots dormant corms before they sprout. The sphagnum moss method provides the perfect balance of humidity and airflow. Here is the workflow to follow.
- Clean the corms. Rinse them gently under lukewarm water. Discard any that feel soft or squishy. Healthy corms feel rock solid, similar to a hazelnut.
- Peel the outer tunic. Rub off the papery brown skin gently. Removing this barrier helps moisture penetrate the corm faster. Be careful not to gouge the firm tissue underneath.
- Prepare the sphagnum moss. Soak high-quality sphagnum moss in water for ten minutes. Wring it out completely until it feels barely damp. Soggy moss causes immediate rot.
- Build the propagation box. Place a layer of damp moss in a clear plastic deli container or ziplock bag. Nestle the peeled corms into the moss. Leave the lid slightly cracked to allow minimal gas exchange.
- Apply bottom heat. This step is non-negotiable. Place the container on a seedling heat mat set between 75°F and 80°F. Cold corms simply stay dormant indefinitely.
- Monitor weekly progress. Open the container every few days to check for mold and airflow. In two to four weeks, you should see white roots emerging. Shortly after, a tiny green spike will appear.
Once the sprouted corm has a visible shoot and several strong roots, transition it to the chunky aroid mix used in Path 1. Do not rush this transfer. Wait until the green spike is at least half an inch tall.
Moving it too early shocks the fragile new growth.
Fatal Propagation Mistakes That Cause Soft Rot and Shock
We have analyzed countless reports from indoor gardeners attempting this process. The same errors happen repeatedly. Avoiding these specific mistakes is the difference between a thriving collection and a pile of rotting corms.
Using dense commercial potting soil. Standard hardware store potting mixes hold way too much water. Tuberous roots need massive amounts of oxygen. If your soil lacks orchid bark and coarse perlite, your divisions will suffocate.
Always mix your own airy substrate.
Overwatering immediately after division. People panic when they see a freshly cut plant. They soak the soil trying to "help" it recover. The corm stores its own water reserves.
Wet soil surrounding an open wound guarantees bacterial soft rot within days. Keep the medium barely moist until new roots anchor.
Dividing during winter dormancy. If your home drops below 65°F at night, the plant slows down drastically. Cutting a resting plant causes severe physiological shock. It lacks the active cellular energy needed to heal the wound.
Always wait for the longer, warmer days of spring.
Ignoring ambient humidity drops. Unpotting a plant temporarily disrupts its water uptake. If your room air is dry, the existing leaves will crisp up fast. Run a humidifier near your recovering divisions for the first two weeks.
Aim for roughly 60% to 80% relative humidity during this critical window.
Skipping tool sterilization. Erwinia bacteria live on unwashed blades. One dirty cut introduces pathogens straight into the corm tissue. Always wipe your scalpel with 70% isopropyl alcohol before making contact with the plant.
Treat sanitation like a strict rule rather than a suggestion.
Post-Division Aftercare: Soil Mix, Humidity, and Acclimation
Getting the cut made is only half the job. The weeks immediately following division determine if your new plant survives. You have to treat a freshly separated offset like a recovering patient.
Stability is everything right now.
First, let us talk about the soil mix. Standard potting soil holds too much moisture for tuberous roots. Our research shows that a chunky aroid mix provides the necessary oxygen flow.
A reliable ratio is 40% orchid bark, 30% perlite, 20% coco coir, and 10% worm castings. This blend drains fast while holding just enough ambient moisture.
Next, manage your humidity levels carefully. When you sever a pup from the mother plant, its water supply gets interrupted. If your room air is dry, the leaves will crisp up rapidly.
Aim for 60% to 80% relative humidity during the first two weeks. Placing a humidifier nearby works perfectly for this.
Light placement matters just as much as moisture. Keep your newly potted divisions out of direct sunlight. Bright, indirect light gives the plant energy without scorching stressed leaves.
A spot near an east-facing window usually hits the sweet spot. Avoid harsh afternoon sun completely.
Do not rush to feed the plant. Fresh cuts and fragile new roots burn easily when exposed to fertilizer salts. Wait at least four to six weeks before applying any liquid nutrients.
Let the root system establish itself in the fresh substrate first. Water only when the top inch of the mix feels dry.
If you notice the oldest leaf turning yellow, do not panic. The plant often sacrifices one lower leaf to redirect energy toward root growth. Just snip it off cleanly once it fully crisps.
Keep the environment warm and stable.
| Aftercare Factor | Target Specification |
|---|---|
| Ambient Temperature | 70°F to 85°F (21°C to 29°C) |
| Relative Humidity | 60% to 80% |
| Light Exposure | Bright, indirect (no direct sun) |
| Fertilizer Schedule | Withhold for 4 to 6 weeks |
| Watering Frequency | Only when top inch is dry |
Patience pays off here. Once you see a new leaf unfurl with those distinct asymmetrical lobes, you know the corm has successfully anchored. From there, you can slowly transition the plant back to normal houseplant care routines.
Frequently Asked Questions
Can you propagate Xanthosoma albo-marginatum from a single leaf?
No, you cannot propagate this plant from a leaf cutting alone. It grows from underground corms rather than stem nodes. A severed leaf lacks the storage tissue required to generate new roots.
It will simply rot in water or soil within a few days.
How long does it take for dormant corms to sprout?
Dormant corms typically take two to four weeks to show initial white roots. A visible green shoot usually follows shortly after that. Using a seedling heat mat set to 75°F speeds up this timeline significantly.
Cold temperatures keep the corms asleep indefinitely.
Why is my divided pup turning yellow and mushy?
Yellowing and mushiness indicate bacterial soft rot caused by excess moisture. This happens when freshly cut corms sit in soggy soil before callusing. Always let cut wounds dry for two hours before potting.
Use a highly aerated chunky soil mix to prevent waterlogging.
Should I remove the papery skin off dormant corms before planting?
Yes, gently rubbing off the outer brown tunic helps moisture reach the corm faster. Be very careful not to gouge the firm tissue underneath. Peeling the skin reduces the time it takes for roots to break through.
Skip this step only if the corm feels unusually soft.
What is the best time of year to divide basal offsets?
Spring and early summer are the safest times to divide these plants. Active growth hormones help the mother plant and the pup heal their wounds quickly. Never attempt division during winter dormancy when temperatures drop below 65°F.
The plant lacks the energy to recover from the shock.

Similar Posts