Convert Your Gas Mower to Electric: Complete DIY Guide
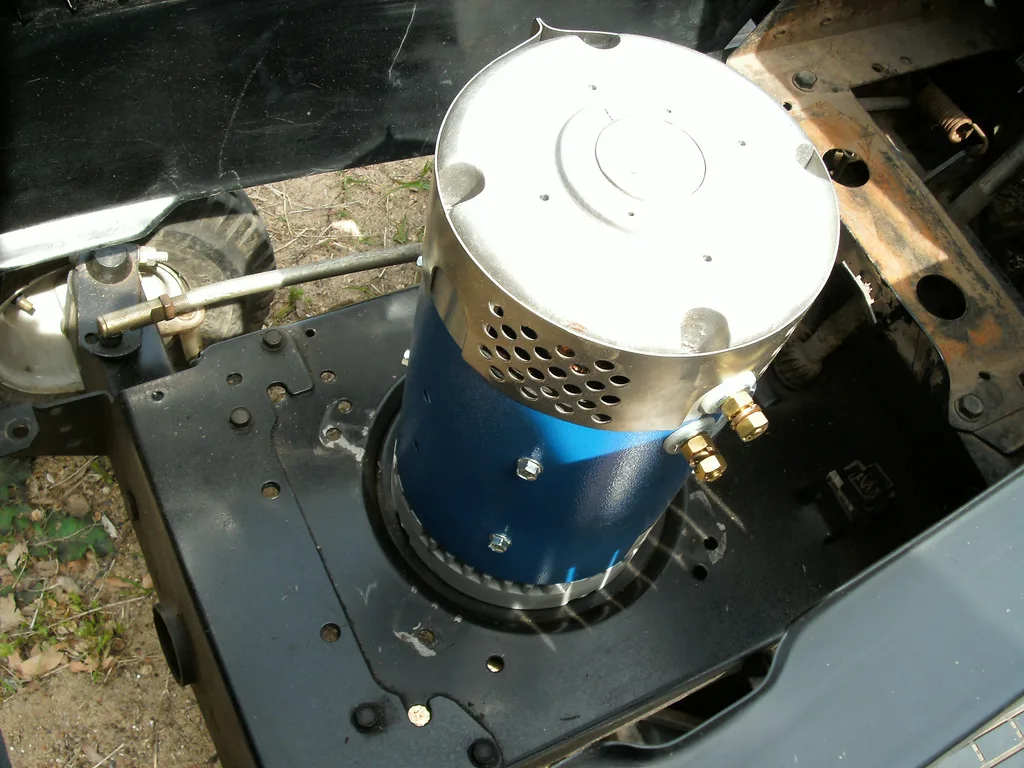
An electric lawn mower conversion replaces a gas engine with a battery and motor. You strip the old engine, mount a new drive system, and wire it up. We see people attempt this to save money or avoid buying a new machine.
But skipping safety steps can cause severe fires or electrical shock.
A standard 21 inch push mower needs about 1500 watts of continuous power. That requires heavy wiring and strict fusing to meet basic NFPA electrical safety standards. Let us look at what keeps you safe during this build.
Image source: Bing (Web (fair-use with source credit))
Quick Answer
An electric lawn mower conversion swaps a gas engine for batteries. You need a brushless motor and controller. A 48 volt system usually powers a standard push mower.
Always install a main fuse near the battery. Never skip the dead man safety switch.
Why Getting an Electric Lawn Mower Conversion Wrong Can Cost You Everything
Swapping a gas engine for a battery sounds like a fun weekend project. It is not a simple plug and play job. You are dealing with high current DC electricity that does not forgive mistakes.
If you wire a 48 volt lithium pack without proper protection, things go wrong fast.
The biggest risk is thermal runaway in unprotected lithium cells. This happens when a cell overheats and triggers a chain reaction in the rest of the pack. It creates intense fires that standard extinguishers struggle to put out.
Manufacturer specifications confirm that cheap, unbranded battery management systems often lack critical overcurrent protection.
You also face serious arc flash hazards. Connecting high amperage DC circuits under load can melt tools and burn skin. That is why you must use a main contactor to handle the heavy switching.
Your throttle switch should only carry a tiny signal voltage to trigger that contactor safely.
If your donor mower deck has structural rust, stop right there. Do not weld heavy motor mounts onto thin, corroded steel. The vibration from a brushless DC motor will tear it apart quickly.
Only use mechanically sound frames for this kind of electrification work.
We always recommend following established electrical codes even for small vehicles. Applying principles from the National Electrical Code to your low voltage wiring prevents disasters. Treat every wire like it carries enough power to start a fire.
Because in this setup, it absolutely does.
Sizing Your BLDC Motor, Battery Pack, and Controller for a 21-Inch Deck
Sizing your components correctly determines if your mower actually cuts grass or just pushes air. A 21 inch deck typically demands between 1000 and 1500 watts of continuous power. Hitting thick, wet grass will spike that demand instantly.
Your entire electrical system must handle those surges without shutting down.
Start by picking your system voltage. Most builders choose a 48 volt nominal setup as of 2026. Higher voltage means lower amperage for the same total wattage.
Lower amperage allows you to use thinner, lighter wire while reducing heat buildup in your cables.
Next, select a brushless DC motor with the right KV rating. The KV rating tells you how many RPMs the motor spins per volt applied. You need to match the original gas engine pulley ratio to hit roughly 19000 feet per minute at the blade tip.
That speed guarantees a clean cut instead of tearing the grass.
Your electronic speed controller must exceed the motor peak amp draw. If your motor pulls 30 amps continuously, buy a controller rated for at least 45 amps. Undersizing the controller is the fastest way to melt your wiring harness.
Aggregate user reviews show that cheap controllers fail rapidly under heavy mowing loads.
Here is a breakdown of typical component sizing for a standard push mower conversion.
| Component | Specification | Purpose |
|---|---|---|
| System Voltage | 48V Nominal | Reduces overall amp draw |
| Continuous Power | 1000W to 1500W | Handles standard grass cutting |
| Wire Gauge | 10 AWG or 8 AWG | Carries 30 to 40 amps safely |
| Motor Type | Brushless DC | Provides instant torque and efficiency |
| Fuse Rating | 50A ANL or Class T | Protects against short circuits |
Battery capacity dictates your total runtime. A 48 volt pack built from 21700 cells gives you great energy density. Aim for at least 10 amp hours to mow a standard suburban yard.
LiFePO4 chemistry offers better thermal stability if you prioritize safety over keeping the weight down.
The Build: Wiring the BMS, Contactor, and Dead-Man Switch Safely
The physical build requires careful planning before you ever crimp a single connector. Start by removing the gas engine, fuel tank, exhaust, and old throttle cables. Clean the deck thoroughly so you have a flat surface for fabrication.
You will need to drill new holes for your custom motor mount plate.
Fabricating the motor mount is your most critical mechanical step. The shaft must align perfectly with the blade spindle or drive pulley. Any misalignment causes rapid belt wear and dangerous vibration.
Use thick aluminum or steel plate to ensure the mount stays rigid under full torque.
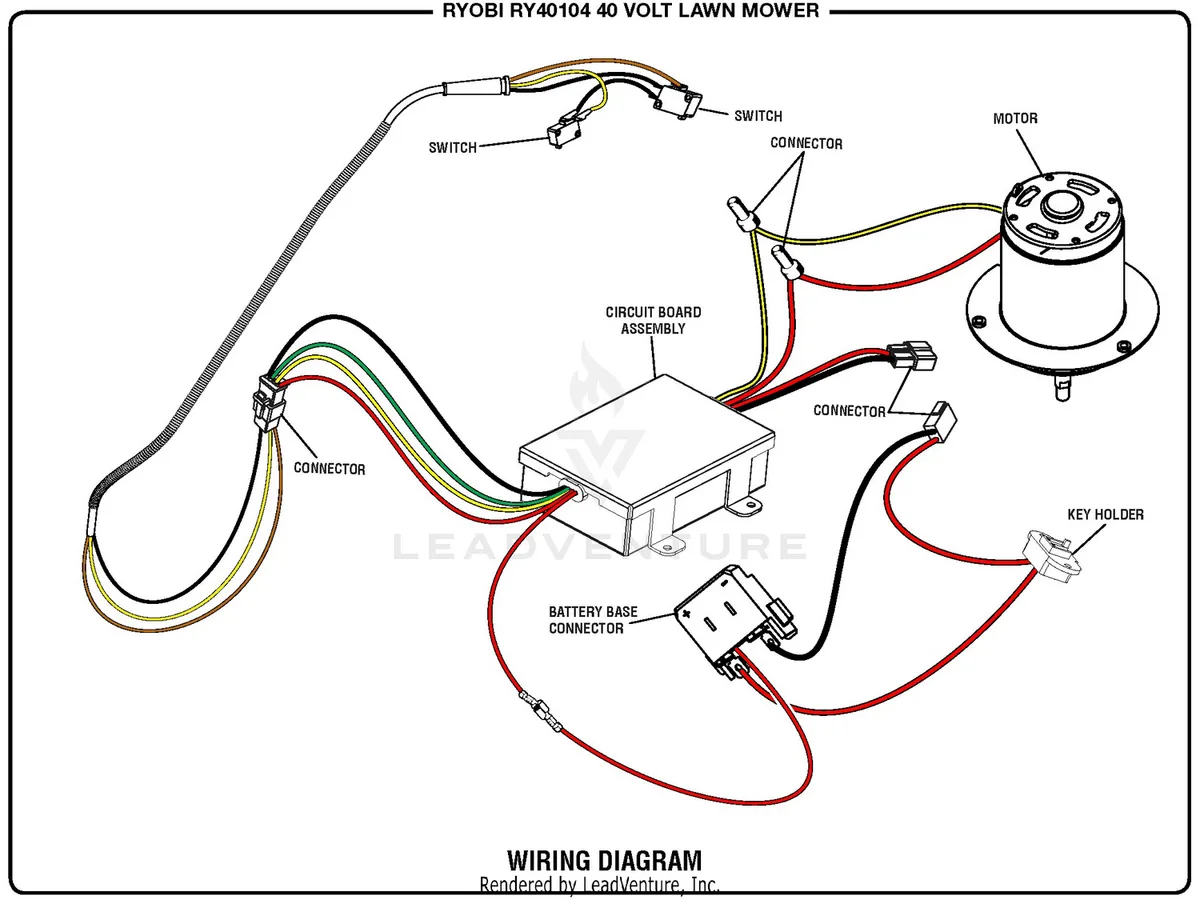
Image source: Bing (Web (fair-use with source credit))
Building the battery pack requires spot welding nickel strips across your chosen cells. Never solder directly to lithium cell terminals because the heat damages internal seals. Integrate your battery management system directly into the pack wiring.
The BMS monitors individual cell voltages and prevents dangerous overcharging or deep discharging events.
Routing your high current cables takes patience. Keep thick power wires far away from sharp metal edges and moving belts. Use grommets anywhere a cable passes through the mower deck frame.
Secure everything tightly with adhesive lined heat shrink and zip ties to prevent vibration damage over time.
Wiring the safety loop is non negotiable. Your dead man lever must break the signal circuit to the controller instantly. When you let go of the handle, the blade stops spinning within seconds.
Wire this switch in series with the controller signal line using reliable Anderson Powerpole connectors.
Install your main fuse within six inches of the battery positive terminal. An ANL or Class T fuse provides the fast blow protection you need for DC circuits. Route the fused positive line directly to your main power contactor.
The contactor acts as a heavy duty relay controlled by your key switch.
Always test the complete system unloaded first. Lift the rear wheels off the ground and engage the throttle briefly. Listen for strange noises and check for excessive heat at the connections.
Only take it to the grass after confirming the motor spins smoothly and the kill switch works flawlessly.
Conversion vs. Buying New: Real Costs, Runtime Data, and Tradeoffs
Deciding between building a custom rig and buying a factory electric mower comes down to your priorities. Factory models from brands like EGO or Greenworks offer guaranteed safety testing and warranties. A DIY conversion gives you total control over battery size and repairability.
Both paths have very different cost structures and long term value.
Let us look at the actual numbers involved in a typical conversion project. Building a reliable 48 volt system usually costs between $150 and $350 in parts. That assumes you already own a working donor mower deck with good wheels.
Buying a comparable commercial battery mower often starts around $400 and climbs much higher for premium models.
Runtime depends entirely on the battery capacity you choose to build. A 10 amp hour pack at 48 volts stores roughly 480 watt hours of energy. At a 1000 watt continuous draw, that gives you just under 30 minutes of hard mowing.
Doubling the cells doubles your runtime but adds significant weight to the push frame.
Charging times favor custom builds if you use a quality CC/CV lithium charger. A 5 amp charger fills a 10 amp hour pack in about two hours. Factory chargers sometimes limit charging speeds to protect cheaper internal cells.
You control the charge rate in a custom build as long as your BMS supports it.
Safety certification is where commercial mowers hold a massive advantage. Factory packs undergo rigorous testing to meet standards like UL 2271 for light electric vehicle batteries. Your homemade pack lacks third party verification unless you pay for expensive lab testing.
That places the burden of safe assembly entirely on your shoulders.
Repairability heavily favors the DIY route once the warranty period ends. If a commercial mower controller fails, you often have to replace proprietary sealed modules. In a custom build, you simply swap out a generic electronic speed controller for thirty dollars.
You can source replacement parts indefinitely without relying on a single manufacturer supply chain.
Consider your local climate before committing to either path. High humidity areas require excellent waterproofing for exposed terminals and controllers. Commercial mowers feature sealed IP rated enclosures designed for wet conditions.
Replicating that level of water resistance on a homemade battery box takes extra effort and silicone gaskets.
Who should actually attempt this build? If you want a guaranteed safe appliance, buy a factory mower. If you understand DC electronics and want a customizable project, build it.
Just never compromise on fusing or cell quality to save a few dollars.
Five Mistakes That Cause Thermal Runaway or Fried Controllers
Mistakes in high current DC projects do not just break your equipment. They create immediate physical danger to you and your property. We see the same errors repeated constantly in DIY conversion forums.
Understanding these failures helps you engineer them out of your build before you flip the switch.
Skipping the main inline fuse is the most catastrophic error you can make. Without a fuse, a short circuit turns your wiring harness into a heating element instantly. The battery dumps its entire capacity into the fault until something catches fire.
Always install an appropriately sized fuse directly at the positive battery terminal.
Undersizing your electronic speed controller guarantees a premature failure. Controllers rated exactly at your motor continuous draw will overheat rapidly in tall grass. The internal MOSFETs cannot dissipate the excess thermal energy fast enough.
Always buy a controller rated for at least 30 percent more current than your motor requires.
Poorly secured battery mounts introduce dangerous vibration into the electrical system. Constant shaking loosens crimped connections and fatigues solder joints over time. A loose high current connection creates electrical arcing inside your battery box.
That arcing generates extreme localized heat capable of igniting nearby plastic or wiring insulation.
Using the wrong wire gauge restricts current flow and generates excessive heat. Thin wires act as resistors when pushed beyond their ampacity ratings. That wasted energy turns directly into heat trapped inside your wire loom.
Stick to 10 AWG or 8 AWG copper wire for any circuit carrying over 20 amps.
Ignoring water ingress risks ruins sensitive electronics during morning mowing sessions. Wet grass throws moisture directly underneath the mower deck constantly. Unsealed controller boxes and exposed battery terminals invite corrosion and short circuits.
Coat exposed PCBs with conformal coating and seal all enclosure lids with silicone gaskets.
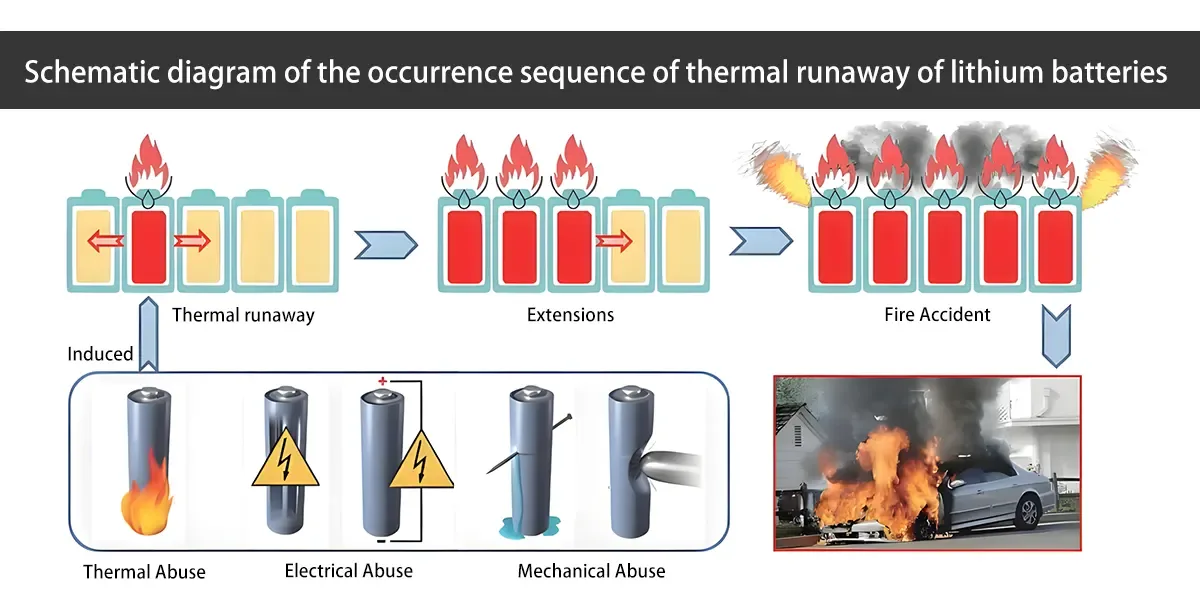
Image source: Bing (Web (fair-use with source credit))
Bypassing the battery management system to get more runtime is incredibly reckless. The BMS disconnects the load if a single cell drops below safe voltage limits. Removing it allows cells to discharge into permanent damage or internal shorting.
Never defeat safety circuits just to squeeze a few extra minutes out of a charge.
Electric Lawn Mower Conversion FAQs
How much does a typical electric lawn mower conversion cost?
A standard build costs between $150 and $350 for parts. That covers the brushless motor, controller, and battery cells. You still need a donor gas mower deck to start.
Buying prebuilt lithium packs pushes the total price higher.
What voltage is best for a push mower build?
Most builders use a 48 volt nominal system. It keeps the amperage low enough for manageable wire sizes. A 48 volt setup easily delivers 1500 watts of continuous power.
Lower voltages require dangerously thick cables to carry the same wattage.
Can I use an old car battery for this project?
Lead acid car batteries are far too heavy for a push mower. They also suffer from massive voltage sag under heavy loads. Lithium ion 21700 cells provide the energy density you actually need.
Stick to purpose built lithium chemistries for small vehicle conversions.
How long will a custom battery pack last while mowing?
A 48 volt 10 amp hour pack provides roughly 30 minutes of hard cutting. Thicker grass drains the cells much faster than dry lawns. Doubling your amp hour rating doubles your total runtime.
Always size your pack based on your actual yard dimensions.
Do I need a special charger for lithium cells?
You absolutely need a CC/CV charger matched to your exact pack voltage. Standard lead acid chargers will overcharge and destroy lithium cells quickly. The charger must communicate properly with your integrated battery management system.
Never improvise charging solutions with mismatched power supplies.
Is it safe to build my own battery pack?
Building packs requires spot welding equipment and strict safety protocols. Soldering directly to cells causes internal heat damage and potential failure. If you lack experience with lithium assembly, buy a professionally built pack instead.
Thermal runaway remains a severe risk for improperly constructed DIY batteries.

Similar Posts