Why Your Arborvitae Green Giant Is Turning Brown & Fixes
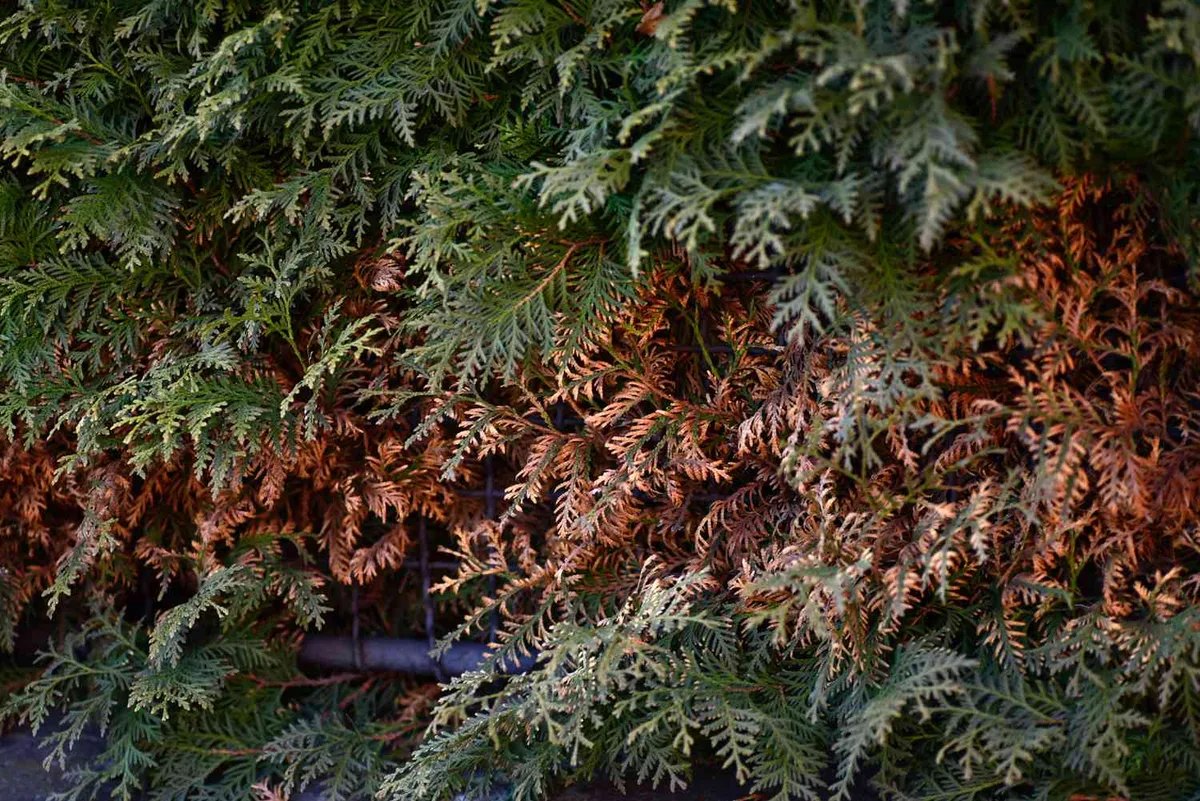
Seeing your arborvitae green giant turning brown is stressful, especially when you planted it for privacy. The cause usually comes down to water, weather, or pests. You need to figure out exactly what is happening before you treat it.
Green Giants grow 3 to 5 feet per year under ideal conditions. But that fast growth demands consistent moisture during the first two seasons. Per Clemson Cooperative Extension research, improper watering causes most evergreen decline.
Let's walk through how to diagnose the problem and fix it.
Image source: Web (Bing) / fity.club (Web image (fair-use with source credit))
Quick Answer
An arborvitae green giant turns brown from stress. Winter burn dries out outer needles. Root rot kills inner foliage first.
Spider mites leave bronze stippling on branches. Check where the browning starts.
Why Your Green Giant Arborvitae Is Turning Brown (And How to Read the Symptoms)
The location of the brown needles tells you everything. You cannot just guess and spray a fungicide. Our research shows that misdiagnosis wastes time and often kills stressed trees faster.
Start by looking closely at where the damage sits.
If the inner canopy near the trunk is dropping needles in fall, relax. That is natural seasonal needle drop. Evergreens shed their oldest interior needles every few years to conserve energy.
It looks alarming but requires zero action.
Outer tips turning crispy brown in late winter means something else entirely. That is winter desiccation, commonly called winter burn. Cold winds pull moisture out of the leaves faster than frozen roots can replace it.
The tree basically dries out while standing still.
Browning that starts at the branch tips and moves inward suggests fungal trouble. Cankers caused by Seiridium or Botryosphaeria girdle the wood. They cut off water flow to the tips.
You will often see sunken, dark spots on the bark itself.
Uniform bronze discoloration across large sections points to spider mites. These tiny pests suck sap from the scale-like foliage. They thrive in hot, dry, dusty conditions.
Tap a suspect branch over a white piece of paper to check.
If you see tiny moving specks on that paper, you have mites. If the branch feels wet and smells sour, look at the soil. Root issues always show up above ground eventually.
Reading these symptoms correctly saves your hedge.
The Diagnostic Decision Tree: Finding the Exact Cause of Browning
Figuring out why your privacy screen is failing requires a simple workflow. Follow this decision tree based on what you see. Match your symptoms to the right branch, then take the recommended action.
- Symptom: Inner needles turn yellow or brown in autumn.
, Condition: Only older needles near the trunk are affected. Outer tips remain green.
, Decision: This is natural senescence.
, Action: Do nothing. Rake up fallen debris if you want.
- Symptom: Outer foliage turns brown and crispy after cold months.
, Condition: Damage faces prevailing winds or direct winter sun. Soil was dry going into winter.
, Decision: Winter burn.
, Action: Wait for spring. Prune dead tips only after new growth pushes past them. Apply anti-desiccant spray next November.
- Symptom: Branch tips die back progressively toward the trunk.
, Condition: Bark has sunken, discolored lesions. Sap might ooze from spots.
, Decision: Fungal canker disease.
, Action: Prune infected branches well below the canker. Sterilize pruners between cuts. Improve air circulation.
- Symptom: Entire sections turn pale bronze or grayish brown.
, Condition: Fine webbing exists near the base of leaves. White paper test reveals moving specks.
, Decision: Spider mite infestation.
, Action: Blast foliage with strong water sprays. Apply horticultural oil or a registered miticide if severe.
- Symptom: Whole tree wilts, yellows, then browns rapidly.
, Condition: Soil stays soggy. Planting hole drains poorly. Root flare is buried.
, Decision: Root rot (Phytophthora).
, Action: Stop watering immediately. Pull mulch away from the trunk. Improve drainage or relocate the tree if young.
Use this table to cross-reference your specific situation quickly.
| Symptom Location | Season Noticed | Likely Cause | Immediate Next Step |
|---|---|---|---|
| Inner canopy only | Fall | Natural needle drop | Leave it alone |
| Outer windward tips | Late winter or early spring | Winter burn | Wait for spring growth |
| Branch tips moving inward | Summer or humid spells | Fungal canker | Prune and sterilize tools |
| Overall bronze tint | Hot, dry summer | Spider mites | Water blast or miticide |
| Entire tree declining | Anytime after heavy rain | Root rot | Fix drainage immediately |
Inner Canopy vs. Outer Tips: Natural Needle Drop, Winter Burn, or Pests
Where the browning happens dictates your entire response plan. Inner browning in October is normal. Outer browning in March is environmental stress.
Knowing the difference prevents unnecessary panic and wasted money on chemicals.
Natural needle drop affects the oldest growth closest to the main trunk. Green Giants shade their own interiors as they grow 3 to 5 feet yearly. Those shaded needles stop photosynthesizing and fall off.
The tree drops them intentionally to focus resources on outer growth.
Winter burn targets the opposite end of the branch. It hits the newest growth exposed to harsh winds. Frozen ground prevents roots from taking up replacement water.
The leaves desiccate and die, leaving crispy brown tips facing the wind.
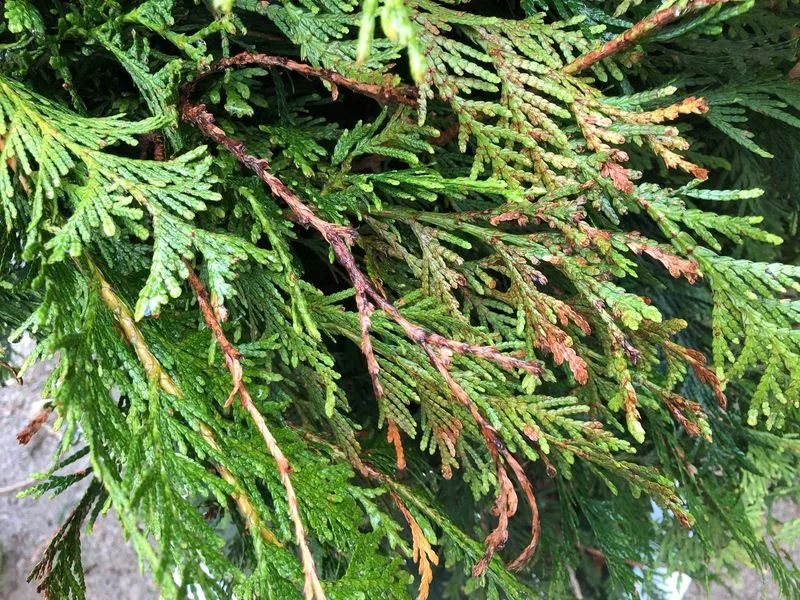
Image source: Bing (Web (fair-use with source credit))
Pest damage like spider mites does not care about wind direction. Mites attack wherever conditions are hot, dry, and dusty. They pierce individual cells and drain the contents.
This leaves a stippled, bronze appearance rather than solid brown patches.
Bagworms present another visual clue. They build protective cases out of the tree's own foliage. You will see small, cone-shaped bags hanging from branches.
Inside those bags, caterpillars eat the scale leaves until the branch dies.
To tell them apart, get close. Look at the pattern. Solid brown tips mean weather.
Speckled bronze means bugs. Bare inner stems in fall mean normal aging.
Root Zone Red Flags: Drought Stress, Clay Soil Drainage, and Root Rot
Soil conditions drive almost all catastrophic browning events. Green Giants have shallow, fibrous root systems. They need consistent moisture without sitting in standing water.
Getting that balance wrong triggers rapid decline.
Drought stress shows up slowly. The foliage loses its deep green luster first. Then the tips curl slightly inward to reduce surface area.
Eventually, the whole tree takes on a dull, grayish brown cast.
This happens frequently in sandy soils or during unexpected heat waves. Newly planted trees need roughly 1 inch of water per week. Shallow daily sprinkling encourages weak surface roots.
Deep, infrequent soaking forces roots downward where moisture lasts longer.
Clay soil creates the exact opposite problem. Heavy clay holds water against the roots for days. Oxygen gets pushed out of the soil pores.
Roots suffocate and begin to decay.
That decay invites Phytophthora, a water mold that destroys root tissue. Once root rot sets in, the tree cannot drink even if the soil dries out. The above-ground symptoms mimic drought perfectly.
That similarity tricks many homeowners into watering a drowning tree.
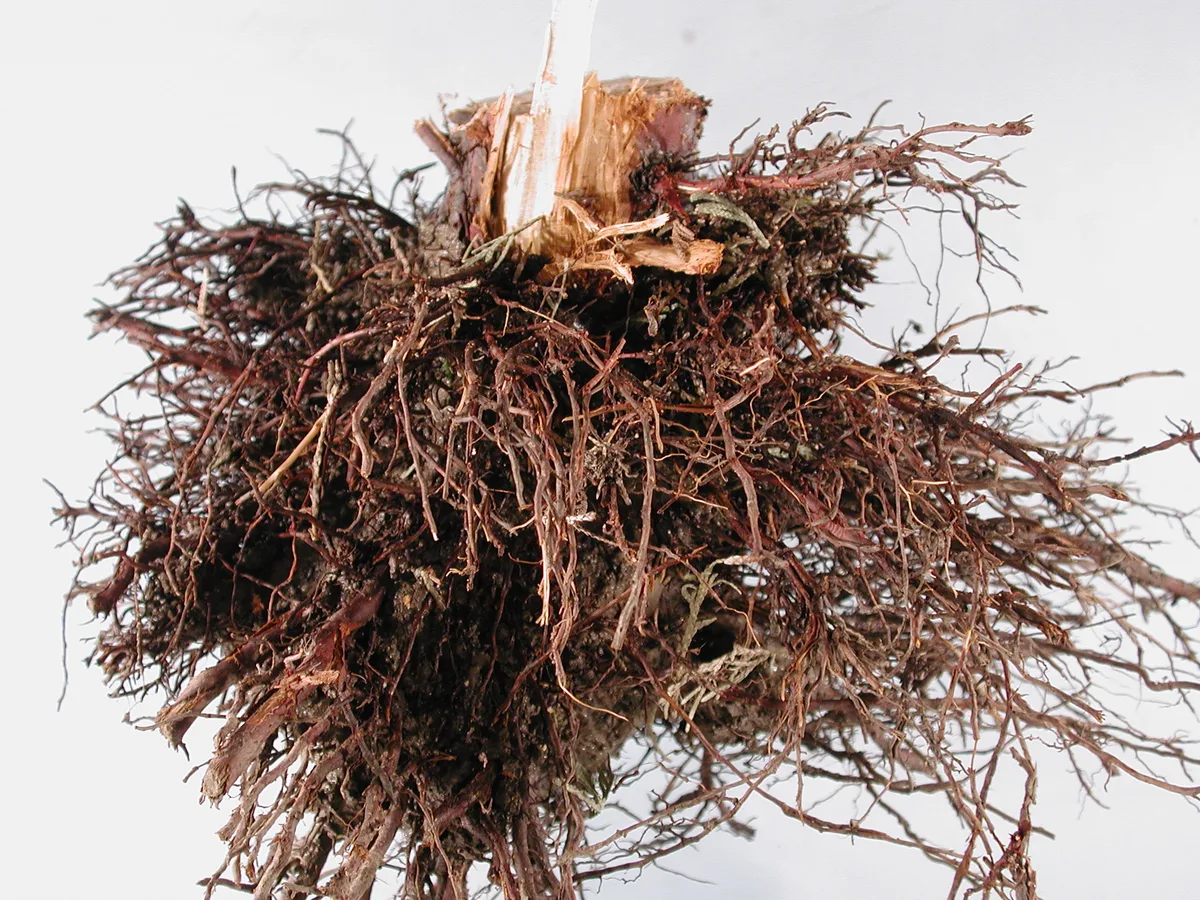
Image source: Web (Bing) / pnwhandbooks.org (Web image (fair-use with source credit))
Test your drainage before assuming anything. Dig a hole 12 inches deep near the root zone. Fill it with water and watch how fast it disappears.
Good soil drains completely within 2 to 4 hours.
If water sits there overnight, you have a drainage problem. Mulch volcanoes piled against the trunk make this worse. Always keep mulch 2 to 3 inches deep.
Leave a 3-inch bare ring directly around the trunk bark.
Branch Dieback and Cankers: When Fungal Disease Takes Hold
Fungal pathogens enter through wounds or stressed tissue. Seiridium and Botryosphaeria are the primary culprits for arborvitae. They cause localized dieback that spreads if ignored. Unlike winter burn, fungal damage rarely resolves on its own.
Look for sunken areas on the bark. These cankers disrupt the vascular tissue underneath. Water traveling up from the roots hits that roadblock and stops.
Everything above the canker starves and turns brown.
You might also notice resin oozing from the infected spot. The tree tries to wall off the invader. It rarely succeeds without help.
Humid summers accelerate fungal spread significantly.
Pruning is your only real defense here. Cut the branch at least 6 inches below visible damage. Make clean cuts into healthy, green wood.
Dip your pruning shears in a 10 percent bleach solution between every single cut.
Skipping tool sterilization spreads spores to healthy branches instantly. Bag and trash the diseased wood. Do not compost it.
As of 2026, university extension programs still emphasize sanitation as the primary control method for evergreen cankers.
Fungicides exist but work best as preventatives. Applying copper-based sprays after an infection takes hold wastes effort. Focus on reducing plant stress instead.
Healthy, well-watered trees resist fungal entry much better than weakened ones.
Step-by-Step Fixes Based on Your Diagnosis
Once you know the cause, follow the matching repair protocol. Do not mix treatments randomly. Overwatering a mite-infested tree invites root rot.
Spraying fungicide on winter-burned needles does nothing.
Fixing Winter Burn
- Wait until mid-spring when new growth emerges.
- Perform a scratch test on brown branches. Scratch the bark lightly with your thumbnail.
- If the tissue underneath is green, the branch is alive. Leave it alone.
- If the tissue is brown and brittle, prune it back to live wood.
- Water deeply once a week during dry spring spells to support recovery.
- Apply an anti-desiccant spray next late fall to protect new growth.
Treating Spider Mites
- Attach a high-pressure nozzle to your garden hose.
- Blast the foliage thoroughly, focusing on the undersides of branches.
- Repeat this water treatment every three days for two weeks.
- If mites persist, apply horticultural oil according to label directions.
- Avoid broad-spectrum insecticides that kill beneficial predatory mites.
Managing Root Rot and Drainage Issues
- Stop watering immediately if the soil feels soggy.
- Pull all mulch away from the trunk to expose the root flare.
- Aerate the surrounding soil gently with a garden fork.
- Redirect downspouts away from the planting bed.
- If the tree is newly planted and sitting in a clay bowl, dig it up.
- Replant it slightly higher so the root flare sits above grade.
Addressing Fungal Cankers
- Identify all branches showing tip dieback or sunken bark.
- Sterilize bypass pruners with rubbing alcohol or a bleach solution.
- Cut infected branches well below the visible canker margin.
- Dispose of all clippings in sealed bags off-site.
- Improve spacing if trees are planted too tightly together.
- Ensure overhead irrigation is replaced with drip lines or soaker hoses.
Consistency matters more than speed here. Trees recover on biological timelines, not human ones. Expect several weeks before new green tips appear on stressed branches.
Dead wood will never turn green again.
Common Mistakes That Make Arborvitae Browning Worse
Good intentions ruin a lot of hedges. Homeowners see brown needles and react emotionally. That reaction often compounds the original problem.
Avoiding these errors keeps your Green Giants alive while they recover.
Watering too frequently tops the list. People assume brown means thirsty. They run sprinklers daily.
In heavy clay soils, that daily soaking drowns the shallow roots and triggers Phytophthora. Deep, weekly watering beats daily misting every time.
Planting too deep causes slow, invisible death. Nurseries often pot trees slightly deeper than ideal. If you drop the root ball into the ground exactly as it came out of the pot, the root flare ends up buried.
Buried bark rots.
Always locate the root flare before backfilling. That is the point where the trunk widens and transitions into roots. It must sit slightly above the surrounding soil grade.
Excess soil piled against the trunk acts like a wet bandage.
Mulch volcanoes create the same issue. Piling mulch 8 inches high against the trunk traps moisture. It also invites rodents to chew the bark in winter.
Keep mulch flat and strictly 2 to 3 inches deep.
Over-fertilizing stressed trees burns them further. High-nitrogen synthetic fertilizers demand water to process. A drought-stressed tree cannot supply that water.
The salts accumulate in the soil and scorch the roots. Skip fertilizer until the tree shows active green growth again.
Ignoring dog urine damage frustrates many fence-line plantings. Dog urine contains concentrated nitrogen and salts. Repeated exposure on lower branches mimics chemical burn.
Rinse affected areas with water immediately if you catch it happening.
Finally, pruning at the wrong time opens doors for disease. Cutting into live wood during wet, humid summer weather invites fungal spores. Prune during dry spells whenever possible.
Clean cuts heal faster and resist infection better than ragged tears.

Similar Posts