How to Grow Potatoes in a Laundry Basket Easily
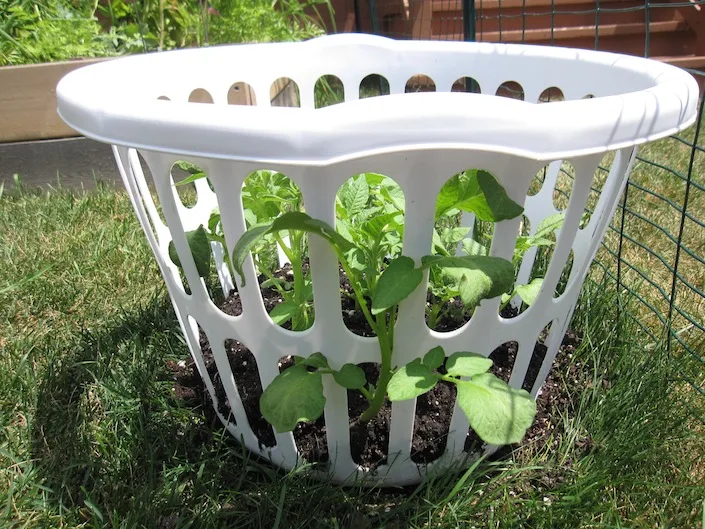
Growing potatoes in a laundry basket solves the problem of tight garden space. You get a full harvest without digging up your yard. This method works perfectly for balconies, patios, or small backyards.
It turns a basic household item into a highly productive planter.
Our research shows a standard 2 cubic foot basket yields 3 to 7 pounds of potatoes. You just need HDPE plastic and proper drainage holes drilled in the base. Let's walk through exactly how to set this up and keep your crop thriving.
Image source: Bing (Web (fair-use with source credit))
Quick Answer
Growing potatoes in a laundry basket is a simple container gardening method. You plant sprouted seed potatoes in a soil-filled plastic basket. Add more soil as the stems grow taller.
Harvest by dumping the basket out after 70 to 120 days.
Why a Laundry Basket Works for Growing Potatoes (And When It Doesn’t)
A laundry basket gives you total control over your soil environment. If your native ground is heavy clay or rocky, container growing bypasses that entirely. You build the perfect root zone from scratch using a fluffy potting mix.
Plastic baskets are also lightweight and rigid. Fabric grow bags breathe better, but they flop over when wet. A solid basket holds its shape even when packed with 50 pounds of damp soil.
That stability matters on a windy balcony.
This setup isn't perfect for every situation, though. If you live in a hot climate like USDA Zones 9 or 10, dark plastic absorbs intense heat. That bakes the roots and stunts tuber formation.
In those areas, you must grow potatoes as a winter crop or keep the basket in deep shade.
If you want massive yields for winter storage, a single basket won't cut it. Traditional in-ground trenching produces far more volume per square foot. But if you want fresh, early potatoes with zero digging, this workflow is hard to beat.
Who Should Use This Method?
- Apartment renters with limited patio space
- Beginners wanting a low-risk first gardening project
- Gardeners dealing with poor or contaminated native soil
- Families doing educational planting projects with kids
Picking the Right Basket, Soil, and Seed Potatoes
Your success depends entirely on three things. The basket material, the soil blend, and the quality of your seed potatoes. Get these right and the rest is just routine maintenance.
First, check the recycling number on the bottom of your basket. You want HDPE (#2) or PP (#5) plastic. These are food-safe and resist UV degradation.
Avoid PVC (#3) plastics entirely, as heat causes them to leach harmful chemicals into your soil.
The basket needs to hold at least 1.5 cubic feet of dirt. Anything smaller dries out too fast. Drill half-inch drainage holes every 3 inches across the entire bottom.
Potatoes rot quickly in standing water, so drainage is non-negotiable.
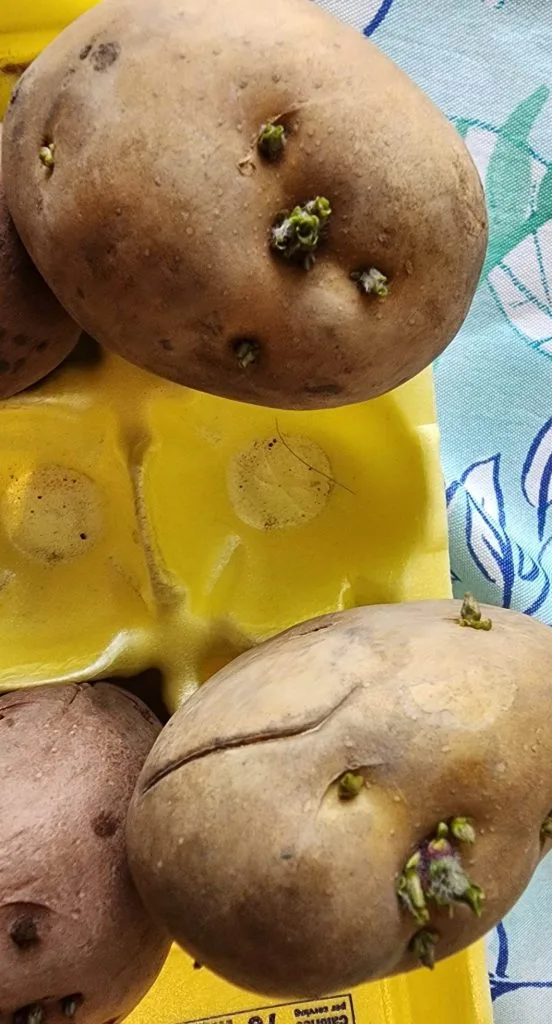
Image source: Bing (Web (fair-use with source credit))
Next, skip cheap topsoil. It compacts into a brick inside a container. Use a high-quality potting mix blended with 30% compost and a handful of perlite.
University extension programs consistently recommend loose, well-draining media for container tubers to prevent common scab disease.
Finally, buy certified disease-free seed potatoes. Grocery store potatoes often carry blight spores or viruses. Cut your seed potatoes into 2-ounce chunks.
Make sure each piece has at least two eyes, which are the little dimples where sprouts emerge.
| Component | Specification | Why It Matters |
|---|---|---|
| Basket Plastic | HDPE (#2) or PP (#5) | Prevents chemical leaching under sun exposure |
| Basket Volume | 1.5 to 3 cubic feet | Holds enough soil to retain moisture |
| Drainage Holes | 1/2 inch wide, spaced 3 inches apart | Prevents fatal root rot |
| Soil Mix | Potting mix, compost, perlite | Stays loose for tuber expansion |
| Seed Pieces | 2 ounces, minimum 2 eyes each | Provides energy for initial stem growth |
The Step-by-Step Workflow: From Chitting to Harvesting
Growing potatoes follows a strict sequence. If you skip steps or rush the timeline, your yield drops significantly. Here is the exact workflow to follow.
Step 1: Chit your seed potatoes. Place your cut seed pieces in a cool, bright spot for two to four weeks. You want short, green, sturdy sprouts to form on the eyes. This process is called chitting, and it gives your plants a massive head start.
Step 2: Prep the basket. Drill your drainage holes if you haven't already. If your basket has wide mesh slots, line the inside with landscape fabric. This keeps the soil from washing out while letting water drain freely.
Step 3: Build the base layer. Add 4 to 6 inches of your potting mix to the bottom. Don't fill the basket to the top yet. You need empty space to add more soil later as the plant grows.
Step 4: Plant the seed pieces. Place one or two seed pieces on top of the soil. Keep the sprouting eyes pointing straight up. Cover them gently with another 4 inches of soil mix.
Water deeply until liquid runs out of the bottom holes.
Step 5: Wait for emergence. Keep the basket in a spot that gets at least six hours of sunlight. Soil temperature must stay above 45°F for roots to establish. Sprouts usually break the surface within two to three weeks.
Step 6: Hill the soil. Once the green stems reach 6 to 8 inches tall, add 3 more inches of soil around them. Leave only the top leaves exposed. Repeat this hilling process every few weeks until the basket is completely full.
Step 7: Harvest. Stop watering when the foliage turns yellow and dies back. Wait two weeks for the potato skins to thicken. Then simply tip the basket onto a tarp and collect your crop.
Watering, Hilling, and Keeping Your Container Crop Alive
Container potatoes dry out much faster than in-ground crops. As of 2026, erratic spring weather makes consistent watering even more critical. Check the soil daily during summer heat.
Stick your finger two inches down. If it feels dry, water immediately.
Overwatering is just as dangerous as underwatering. Soggy soil invites late blight and fungal rot. Always ensure your drainage holes remain unblocked.
Elevating the basket on two bricks helps water escape freely from the bottom.
Hilling is the most misunderstood part of this workflow. You aren't just burying the stem for support. Potato tubers form on tiny stems called stolons, which grow outward from the buried portion of the main stalk.
More buried stem means more space for potatoes to develop.
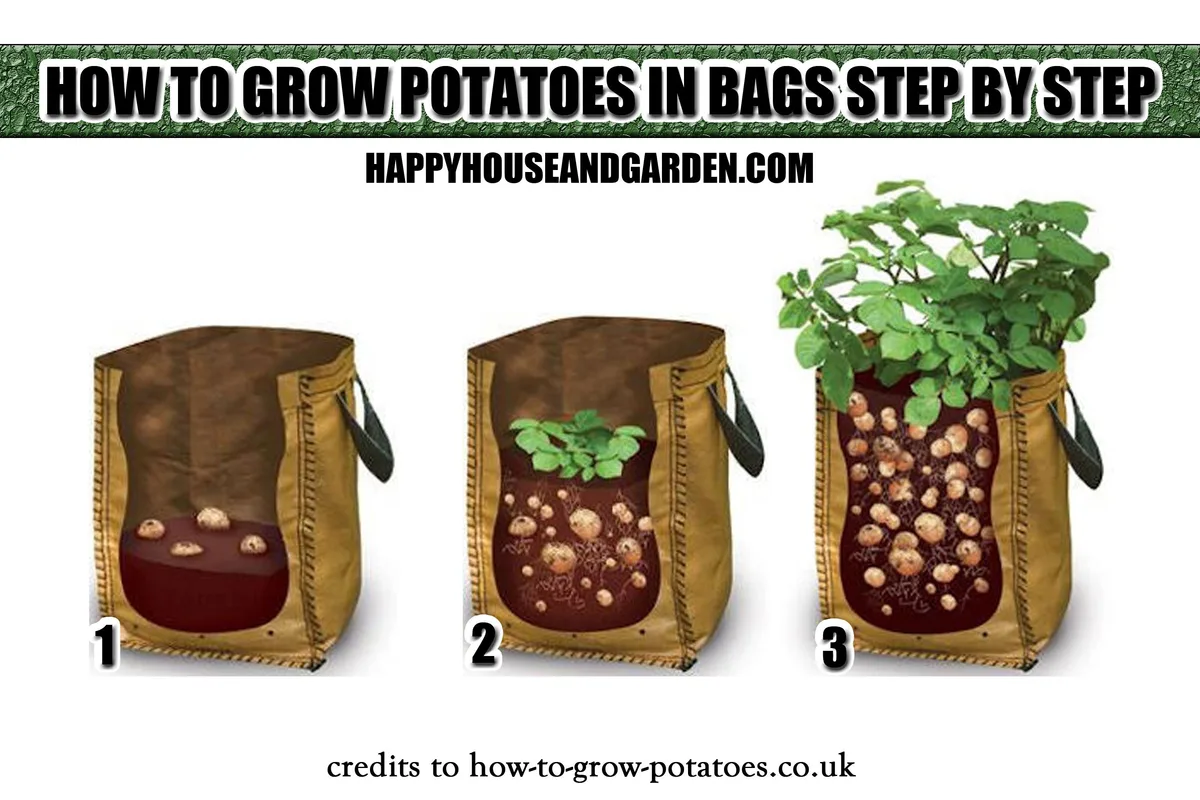
Image source: Bing (Web (fair-use with source credit))
Use a light soil mix for hilling, not heavy dirt. Pack it loosely around the stems. If you compress it too tightly, the expanding tubers will deform or push through the surface.
Exposed potatoes turn green from sunlight exposure.
Green potatoes produce solanine, a toxic compound that causes stomach issues. Never eat a green potato. If you see tubers pushing through the top layer of soil, cover them immediately with more compost or straw.
Feeding your plants requires a specific approach. Avoid high-nitrogen fertilizers. Nitrogen pushes the plant to grow massive leafy tops while ignoring root development.
Instead, use a slow-release organic fertilizer high in phosphorus and potassium. Apply it once when planting and again halfway through the growing season. Per USDA agricultural guidelines, balanced nutrient management prevents soil-borne diseases and supports healthy tuber bulking.
Watch for pests like aphids or Colorado potato beetles. Inspect the undersides of leaves weekly. Pick off any beetles by hand.
A strong spray of water knocks aphids off the foliage before they cause real damage.
Common Mistakes That Ruin a Basket Potato Harvest
Most failures come down to three specific errors. Fix these, and your chances of a great harvest jump dramatically.
Using the wrong potato variety. Potatoes fall into two categories: determinate and indeterminate. Determinate types grow in a single bush layer and don't benefit much from deep hilling. Indeterminate types keep producing tubers up the stem as you add soil.
For a laundry basket, always choose indeterminate varieties to maximize your vertical space.
Skipping the curing phase. After you dump the basket out, don't wash or eat the potatoes immediately. They need to cure in a dark, cool place for one to two weeks. This toughens the skin and heals minor scratches.
Uncured potatoes rot quickly in storage.
Planting too early or too late. Timing depends entirely on your local frost dates. Plant roughly two to four weeks before your last expected spring frost. If you plant in peak summer heat, the soil inside the plastic basket will cook the seed pieces before they sprout.
Filling the basket all at once. We see this constantly. People put six inches of soil at the bottom, plant the potato, and then fill the rest of the basket to the brim immediately. The stem never gets the chance to produce stolons along its length.
You end up with one tiny potato at the very bottom instead of a layered harvest.
Ignoring pH levels. Potatoes prefer slightly acidic soil, ideally between 5.0 and 6.0. Alkaline soil encourages common scab, a bacterial issue that leaves rough, corky patches on the potato skins. Mixing peat moss or pine needles into your potting blend naturally lowers the pH.
Frequently Asked Questions
How many seed potatoes fit in one laundry basket?
Plant one or two seed potato pieces per standard 2 cubic foot basket. Crowding them forces the plants to compete for nutrients and water. You end up with dozens of tiny, marble-sized tubers instead of full-sized potatoes.
Give each plant room to expand its root system.
Do I need to drill holes in a mesh laundry basket?
Solid plastic baskets absolutely require drilled drainage holes. If your basket already has an open wire or mesh weave, you can skip drilling. Just line the inside with landscape fabric first.
Without that liner, your potting mix washes straight out during heavy watering.
Can I grow potatoes in a laundry basket indoors?
Potatoes need at least six hours of direct sunlight daily to form tubers. Indoor windowsills rarely provide enough intensity. If you must grow them inside, use a strong LED grow light running 12 to 14 hours a day.
Keep the area well ventilated to prevent fungal issues.
What happens if my potato skins turn green?
Green skin means the tuber was exposed to sunlight during growth. This triggers solanine production, which is a natural toxin that causes nausea. Never eat green potatoes.
Prevent this by keeping the soil hilled high enough to completely cover developing tubers at all times.
How long does it take to harvest container potatoes?
Early varieties finish in 70 to 90 days after planting. Late-season types need 100 to 120 days. Watch the foliage closely as summer ends.
Once the green leaves turn yellow and die back completely, stop watering and wait two weeks before dumping the basket.

Similar Posts