Why Newly Planted Green Giants Turn Brown & How to Fix It
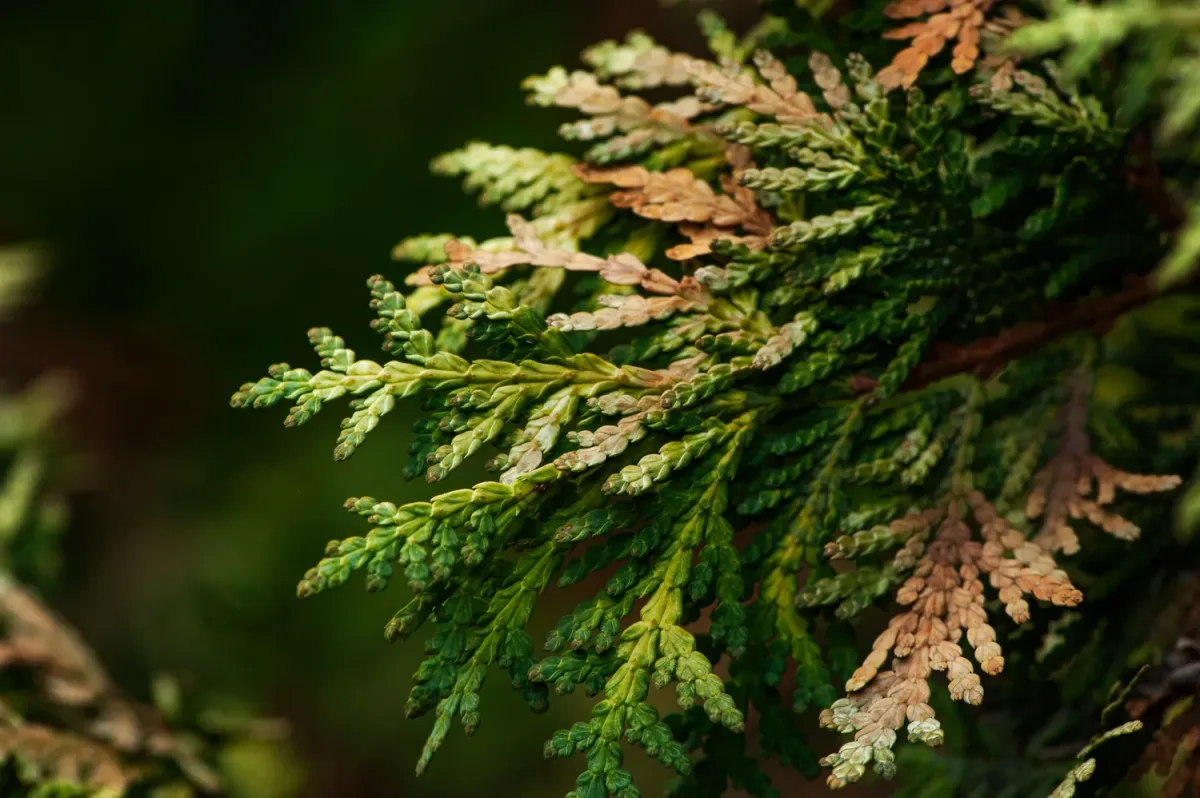
Seeing newly planted green giants turning brown right after installation is incredibly stressful. You paid for a fast privacy screen, and now the trees look dead. Don't panic just yet.
Our research shows that browning arborvitae often recover if you catch the root cause early.
Green Giant arborvitae (Thuja standishii x plicata) can grow 3 to 5 feet per year once established. But establishment takes time. Per Clemson University Cooperative Extension guidelines, improper planting depth is a leading killer of new landscape trees.
Let's figure out exactly what your trees are telling you.
Image source: Web (Bing) / thespruce.com (Web image (fair-use with source credit))
Quick Answer
Newly planted green giants turn brown from water stress or transplant shock. Overwatering causes bottom up browning in heavy clay soils. Underwatering creates crispy brown tips on outer branches.
Interior needle drop is normal shedding after planting. Test your soil moisture before adding more water.
Why Your Newly Planted Green Giants Are Turning Brown
Transplant shock happens when a tree loses part of its root system during digging. The remaining roots cannot support the full canopy. The tree sacrifices older foliage to survive.
This is completely normal for container grown or balled and burlapped trees.
Interior needle shedding looks alarming but rarely signals death. The inner needles closest to the trunk turn brown and drop off. The outer growth stays green and flexible.
This happens because the interior needles no longer receive enough sunlight.
Environmental factors also play a massive role as of 2026. Late fall plantings face winter desiccation. Cold winds pull moisture directly from the evergreen needles.
Frozen ground prevents the damaged root system from replacing that lost water.
Fertilizer burn is another common culprit. Applying synthetic granular fertilizer at planting time damages tender new roots. The excess salts draw moisture away from the root tissue.
This causes rapid tip scorching across the entire canopy.
Sometimes the problem starts before the tree even hits the dirt. If the root ball dried out during transport, the peat based nursery soil becomes hydrophobic. Water simply runs off the sides instead of soaking in.
The tree slowly starves for moisture.
Understanding these core reasons helps you stop guessing. You need a clear way to evaluate the specific damage on your property. That requires looking closely at exactly where the browning begins.
The Diagnostic Decision Tree: Reading Where the Browning Starts
The location of the brown needles tells you exactly what went wrong. Use this simple decision tree to narrow down the problem. Match your tree's symptoms to the conditions below.
If only the interior needles are brown, the tree is experiencing normal transplant shock. Leave it alone. Do not fertilize.
Keep the soil evenly moist while the roots establish over the next few months.
If the branch tips are scorched or yellowish brown, check your planting habits. Did you apply starter fertilizer in the hole? If yes, you likely have salt injury.
Flush the soil heavily with plain water to leach the excess salts away from the roots.
If the tips are brown but you did not use fertilizer, suspect wind scorch. This happens frequently with early spring or late fall plantings. The tree loses moisture faster than its damaged roots can replace it.
Provide a temporary windbreak if possible.
If browning starts at the bottom branches and moves upward, you have a drainage problem. The roots are suffocating in standing water. This is the most dangerous symptom.
It means root rot has likely started.
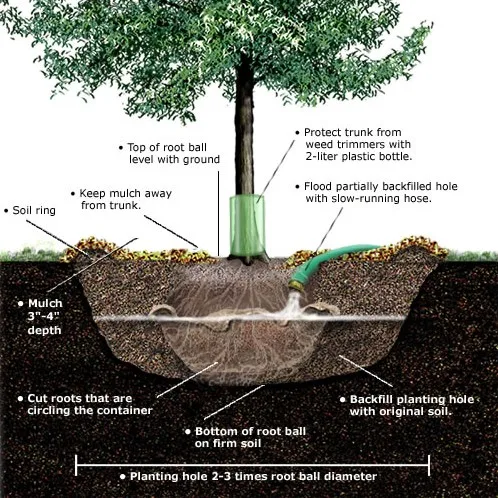
Image source: Web (Bing) / fity.club (Web image (fair-use with source credit))
If the entire tree turned brown rapidly, the root ball was probably bone dry at planting. Bend a small branch gently. If it snaps cleanly, that section is dead.
If it bends without breaking, the tree still has life left.
Here is a quick reference guide to match your symptoms.
| Symptom | Likely Cause | Urgency Level |
|---|---|---|
| Inner needles dropping | Normal transplant shock | Low |
| Crispy outer tips | Fertilizer burn or wind scorch | Medium |
| Bottom branches dying first | Root rot or poor drainage | High |
| Entire tree brown quickly | Severe dehydration or root failure | Critical |
Once you identify the symptom, you must verify the actual soil conditions. Guessing leads to overwatering a drowning tree.
Testing Your Soil and Roots Before You Touch the Hose
Overwatering kills more newly planted Green Giants than drought does. Their shallow fibrous root systems require oxygen just as much as moisture. When soil stays soggy, the roots suffocate and rot sets in quickly.
You need to test the soil before adding any water. Grab a standard flathead screwdriver from your garage. Push it straight down into the soil about 4 inches deep near the root ball.
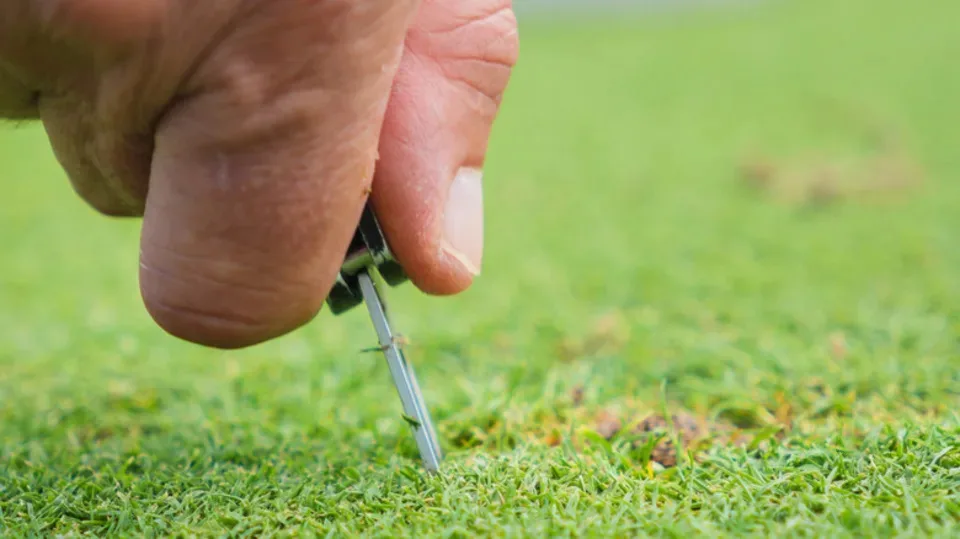
Image source: Web (Bing) / aol.com (Web image (fair-use with source credit))
If the screwdriver slides in easily and comes out covered in mud, stop watering immediately. Your tree is drowning. The soil lacks the oxygen required for root recovery.
If the tool barely pushes in and comes out dusty, your tree needs a deep soak. The root ball has dried out completely. You will need to water slowly so the moisture actually penetrates the soil.
Soil type dictates how often you run this test. Heavy clay holds water for days. Sandy soil drains in a matter of hours.
You cannot use a single watering schedule for every yard.
Check your mulch ring next. Mulch should be about 3 inches thick. It must form a donut shape around the tree.
Leave a 2 to 3 inch gap between the mulch and the actual bark.
Piling mulch against the trunk is called volcano mulching. It traps moisture against the bark and invites fungal diseases. Pull any excess mulch away from the base immediately.
Finally, inspect the trunk flare. This is the spot where the trunk widens slightly before entering the soil. If the trunk goes straight into the ground like a telephone pole, the tree is planted too deep.
Buried root flares smother the tree.
Step-by-Step Fixes Based on What You Found
Fixing a browning arborvitae requires targeted action. Do not throw water at the problem blindly. Follow the specific steps that match your diagnostic results.
If the tree is planted too deep:
Carefully excavate the soil around the base. Use a hand trowel to avoid slicing surface roots. Stop digging when you clearly see the widened trunk flare.
Leave the flare exposed to the air permanently.
If the soil is waterlogged:
Stop all irrigation immediately. If the planting hole acts like a bathtub due to heavy clay, you have a bigger problem. You may need to lift the tree entirely.
Widen the hole to three times the root ball diameter. Backfill with native soil to prevent creating a sump hole.
If the root ball is hydrophobic:
Nursery peat often repels water when fully dried out. Poke several holes gently into the root ball using a wooden dowel. Apply a slow trickle from a garden hose directly over the root zone.
Let it run for 20 to 30 minutes.
A slow soak forces water deep into the original container soil. Fast sprinkler blasts just run off the surface. You want moisture reaching the bottom of the root ball.
If you applied fertilizer at planting:
Flush the planting area heavily with plain water. This dilutes the salt concentration around the tender roots. Going forward, wait a full growing season before applying any fertilizer.
Established roots handle nutrients much better than freshly severed ones.
If winter wind scorch is the issue:
Erect a temporary burlap screen on the windward side. Do not wrap the tree tightly in plastic. Plastic traps heat and encourages premature bud break.
Just block the direct drying wind until spring temperatures stabilize.
Watering frequency depends entirely on your soil type. Use this baseline schedule as a starting point, but always verify with the screwdriver test first.
| Soil Type | Check Frequency | Target Moisture Feel |
|---|---|---|
| Heavy Clay | Every 5 to 7 days | Cool and slightly damp |
| Average Loam | Every 3 to 5 days | Like a wrung out sponge |
| Sandy Soil | Every 2 to 3 days | Dampness fading slowly |
Never rely on a calendar alone. Weather changes everything. A week of rain means you skip watering entirely.
Transplant Shock vs. Root Rot: Knowing When to Wait and When to Act
Telling the difference between normal adjustment and fatal disease saves trees. Transplant shock looks ugly but resolves on its own. Root rot requires immediate intervention or the tree dies.
Transplant shock happens because the canopy outweighs the root system. The tree drops older needles to reduce water demand. The outer branch tips stay green and pliable.
New growth continues slowly at the very ends of the branches.
Root rot presents differently. The browning usually starts at the lowest branches. It creeps upward steadily over a few weeks.
The affected needles turn grayish brown rather than just yellow. The branches become brittle and snap easily when bent.
Phytophthora root rot thrives in saturated soils. It attacks the fine feeder roots first. Without those roots, the tree cannot absorb water regardless of how wet the soil is.
This is why drowning trees look exactly like thirsty trees.
If you suspect shock, practice patience. Do not prune the brown interior needles yet. Wait until spring to see which branches actually push new growth.
Premature pruning removes stored energy the tree desperately needs.
If you suspect root rot, act fast. Check the drainage immediately. Dig down beside the root ball and feel the soil.
If it smells sour or feels like thick mud, the roots are decaying.
Improving drainage is your only real option. You might need to regrade the surrounding soil to direct runoff away. In severe cases, lifting the tree and replanting it higher in the hole gives the roots access to oxygen.
Establishment takes time. A Green Giant typically needs one full growing season to anchor itself properly. During that first year, consistent monitoring beats heavy handed treatments every single time.
Planting Mistakes That Cause Browning (And How to Undo Them)
Most browning issues trace back to the exact moment the tree went into the ground. You can fix many of these errors if you catch them early enough. Ignoring them guarantees the privacy screen will fail before next summer.
Digging a hole too deep is the most common mistake we see in landscaping reports. People treat a planting hole like a bucket. They drop the root ball in and bury the trunk flare under three inches of topsoil.
That buried bark stays wet constantly, inviting fungal rot straight into the main vascular system.
If your trees look like telephone poles stuck in the dirt, act fast. Pull the excess soil away from the base using a hand trowel. Stop digging when you feel the trunk widen outward.
Leave that flare completely exposed to the air permanently.
Failing to shave circling roots ruins container grown Green Giants. Nursery pots force roots to grow in tight circles around the edge of the soil mass. If you just drop that intact root ball into the native soil, those roots keep growing in a circle.
They eventually strangle the main trunk from the inside out.
You have to physically break that pattern during installation. Take a sharp utility knife or pruning saw and make four vertical cuts down the sides of the root ball. Tease the outer roots loose so they point outward toward your native soil.
This forces them to establish properly instead of girdling the tree.
Amending the planting hole with rich potting mix sounds helpful but causes real damage. The roots stay trapped in the fluffy amended soil because it holds water better than the surrounding heavy clay. The hole essentially becomes a bathtub that drowns the root system.
Always backfill with the exact native soil you dug out.
Frequently Asked Questions
Will brown arborvitae needles turn green again?
Dead brown needles will never turn green again. Once the tissue dies, it is gone permanently. However, the branch itself might still be alive underneath.
Wait until spring to see if new green growth pushes out past the damaged areas.
How often should I water newly planted Green Giants?
Watering frequency depends entirely on your soil type. Sandy soils need moisture every two to three days. Heavy clay soils only need checking every five to seven days.
Always use the screwdriver test to verify actual soil moisture before turning on the hose.
Should I fertilize my browning arborvitae to help it recover?
Do not apply fertilizer to a stressed or newly planted tree. Synthetic nutrients burn tender roots that are already struggling to establish. Wait a full growing season before applying any slow release granular fertilizer.
Let the root system anchor itself first.
Can winter winds kill a newly planted Green Giant?
Cold winter winds cause severe desiccation in evergreen trees. The wind pulls moisture from the needles faster than frozen roots can replace it. This results in crispy brown tips across the entire windward side.
Erecting a temporary burlap screen blocks the drying wind effectively.
How do I know if my Green Giant is completely dead?
Bend a few small branches gently near the trunk. Live wood bends without breaking. Dead wood snaps cleanly with a dry cracking sound.
Scratch the bark lightly with your thumbnail to check for green tissue underneath the surface.

Similar Posts