Black Dots on Fern Leaves: Spores vs. Scale Explained
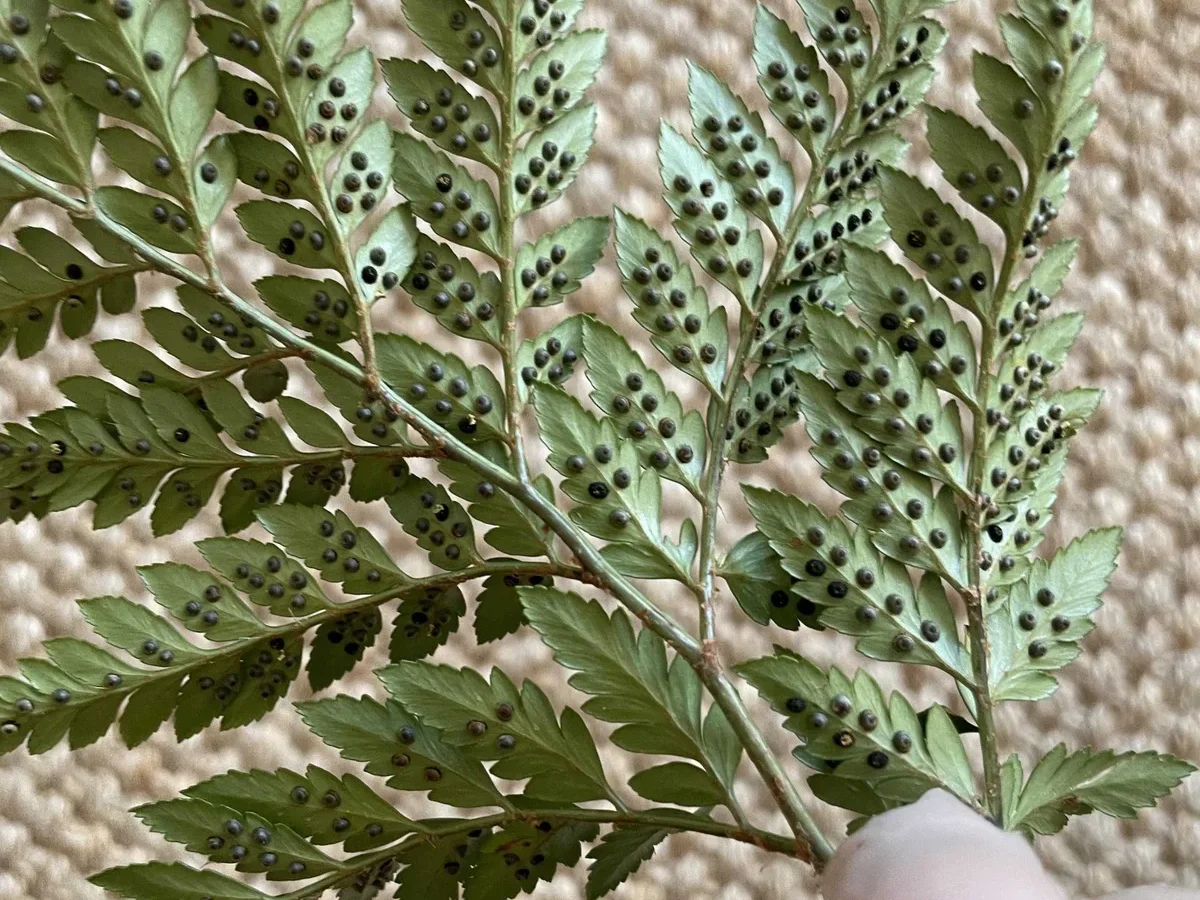
Finding black dots on back of fern leaves usually means your plant is healthy and reproducing. Most often these spots are sori, which are natural clusters of spore cases found on mature fronds. You should only worry if the dots feel sticky, look irregular, or appear on new growth.
Distinguishing between reproductive structures and pests requires a simple tactile test rather than just visual inspection. Per Royal Horticultural Society guidelines, true sori follow specific vein patterns and never smear when touched. This physical difference forms the basis of our diagnostic workflow below.
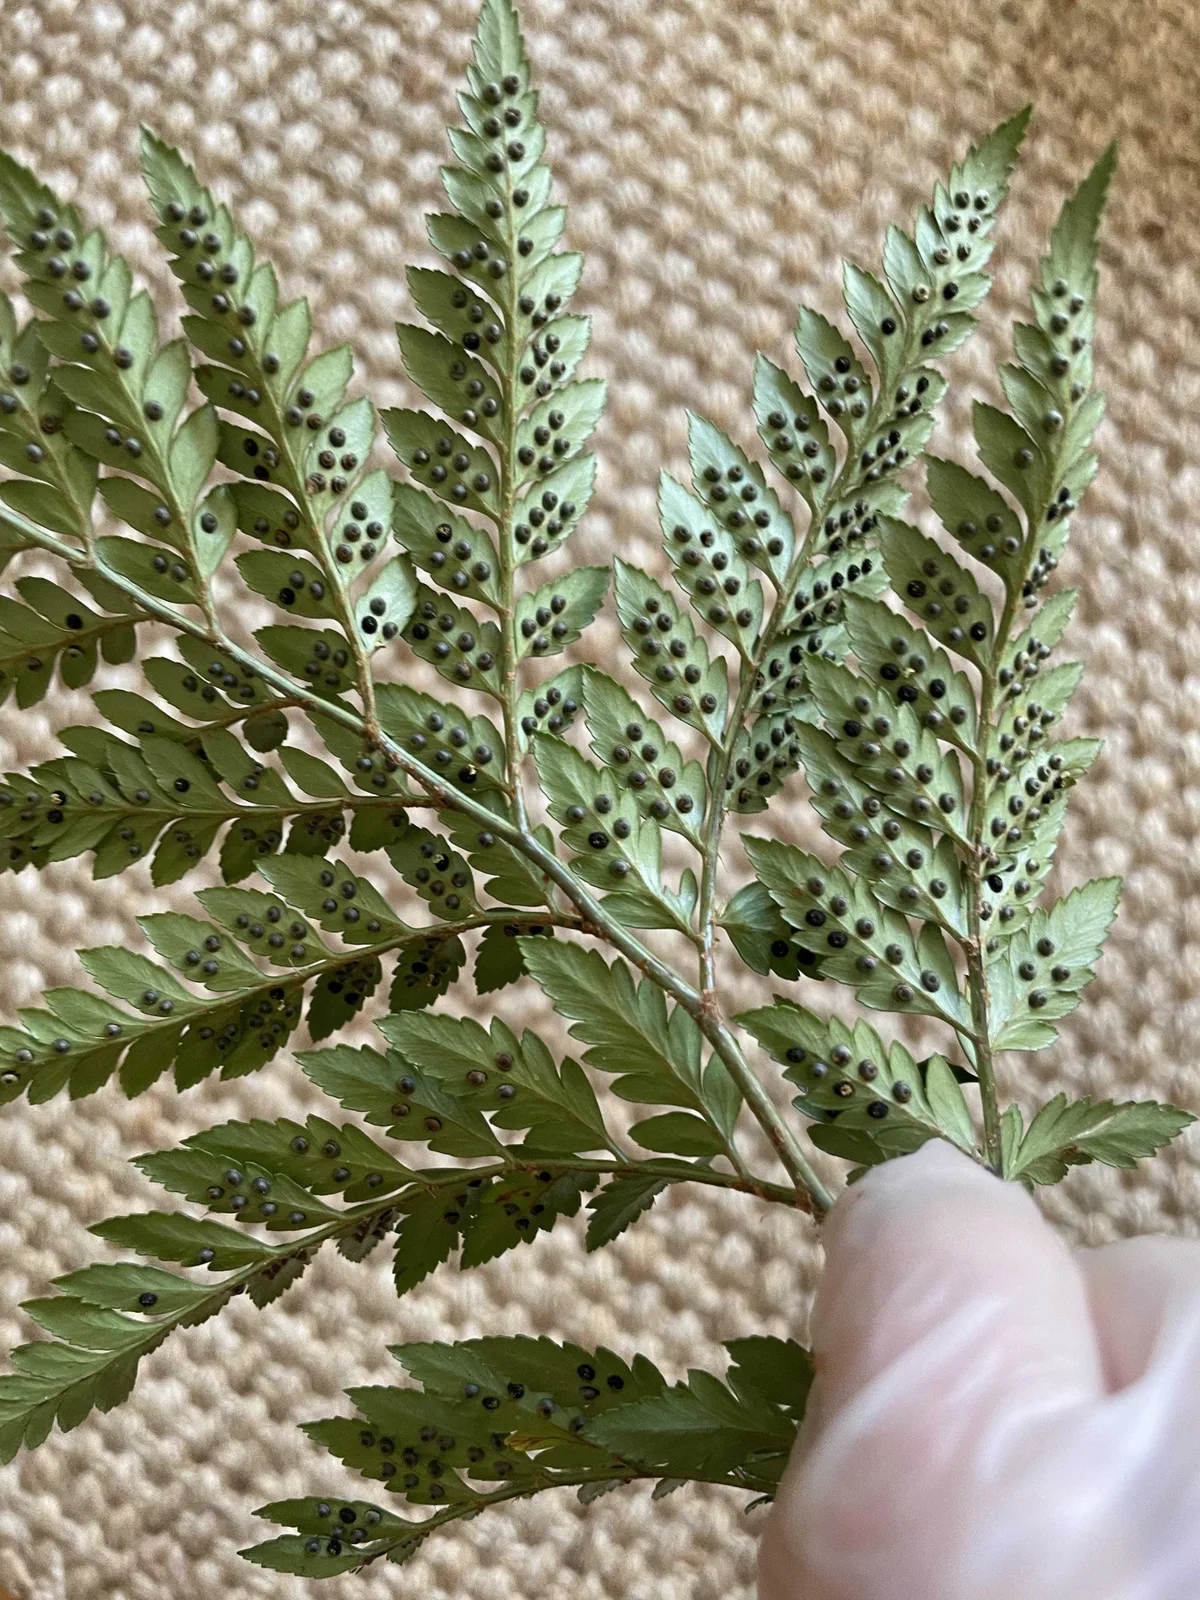
Image source: Web (Bing) / gardenfunction.com (Web image (fair-use with source credit))
Quick Answer
Black dots on back of fern leaves are typically sori. Sori are natural spore cases for reproduction. They appear in uniform rows along veins.
Healthy sori feel dry and slightly raised. Smearing or sticky residue indicates scale insects instead.
The 30-Second Rub Test to Identify What You’re Seeing
The rub test is the single most reliable way to identify black dots on back of fern leaves without magnification. If you gently swipe the spot with your thumb and it stays firmly attached, you are likely looking at sori. These reproductive structures are part of the leaf tissue itself and will not wipe away.
If the dot smears, leaves a sticky residue, or comes off onto your finger, it is almost certainly a pest or pathogen. Scale insects secrete a waxy coating that can feel tacky or leave behind honeydew. Fungal spores may transfer as a powdery dust that stains your skin.
Texture provides another immediate clue during this quick assessment. Sori often feel like fine sandpaper or tiny raised bumps embedded in the frond. Pests like scale tend to feel smooth, waxy, or oddly soft compared to the surrounding leaf surface.
You should also note where the dots are located before rubbing. Sori appear exclusively on mature fronds and follow precise botanical patterns. Random scattering across both old and new growth suggests an infestation rather than natural sporulation.
This thirty-second check prevents unnecessary treatment in most cases. Many fern owners panic and apply pesticides to perfectly healthy plants because they skip this step. Taking a moment to touch the specimen saves time, money, and potential chemical damage to sensitive foliage.
Always wash your hands after performing this test on unknown specimens. Some ferns harbor irritants, and pests can transfer to other houseplants via skin contact. A quick rinse eliminates cross-contamination risks while confirming your diagnosis safely.
Healthy Sori vs. Pests: A Side-by-Side Diagnostic Guide
Differentiating biological features from infestations requires comparing multiple attributes simultaneously. No single trait guarantees identification, but combining pattern, texture, and location creates a reliable decision matrix. Use this comparison table as your primary reference when evaluating black dots on back of fern leaves.
| Feature | Healthy Sori | Scale Insects | Fungal Leaf Spot |
|---|---|---|---|
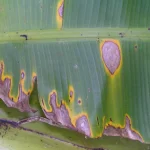
| Pattern | Uniform rows along veins | Random or clustered | Irregular with yellow halo |
| Texture | Dry, gritty, embedded | Waxy, smooth, removable | Powdery or crusty |
| Location | Mature fronds only | Any age, stems too | Older leaves first |
| Residue | None | Sticky honeydew | Dusty spore transfer |
| Color Consistency | Even rust-brown to black | Variable tan to dark | Dark center, lighter edge |
Sori display remarkable geometric precision that pests cannot replicate. They align strictly along vascular bundles or marginal veins depending on species. This organized arrangement reflects the plant’s internal anatomy and remains consistent across all fertile fronds.
Scale insects lack this structural discipline and settle wherever sap flow is accessible. You might find them bunched near midribs or scattered randomly across blade surfaces. Their placement correlates with feeding sites rather than developmental programming.
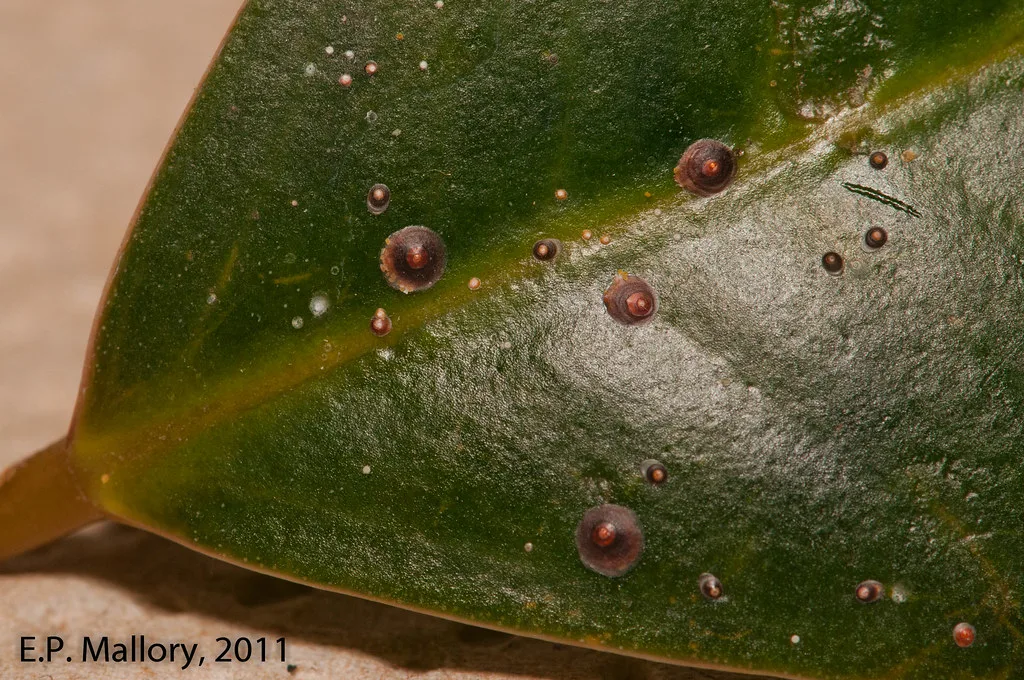
Image source: Bing (Web (fair-use with source credit))
Color consistency offers another strong diagnostic signal for accurate identification. Sori mature uniformly across a frond, shifting from green to tan to deep brown together. Individual spots within a sorus cluster share identical pigmentation at any given stage.
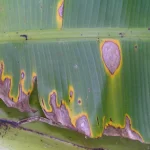
Pests and pathogens show chaotic color variation even within small areas. Young scale nymphs appear translucent while adults darken to black or brown. Fungal lesions develop necrotic centers surrounded by chlorotic margins that blur into healthy tissue.
University extension services emphasize that context matters as much as appearance. Check whether your fern species naturally produces visible sori at this time of year. Some genera like Polystichum bear prominent indusia while others have naked sporangia easily mistaken for disease.
When doubt persists after comparison, isolate the plant and monitor for two weeks. Sori remain static once mature, whereas pest colonies expand visibly over days. Pathogenic spots spread outward and trigger progressive yellowing that healthy reproduction never causes.
When It’s Not Spores: Treating Scale, Aphids, and Fungal Issues
Confirming pests or disease means shifting immediately from observation to targeted intervention. Scale insects require mechanical removal followed by horticultural oil applications spaced seven to ten days apart. This interval disrupts their life cycle by catching newly hatched crawlers before they form protective armor.
Fern aphids respond better to insecticidal soap sprays applied directly to colonies. These soft-bodied pests lack the waxy shielding that makes scale so persistent. Thorough coverage of undersides and stem junctions eliminates populations faster than systemic products in most indoor settings.
Fungal issues demand environmental correction before any chemical treatment succeeds. Reduce overhead watering and increase air circulation around affected specimens immediately. Copper-based fungicides work preventatively but can burn thin fern fronds if misapplied or used during high heat.
Mechanical cleanup reduces pathogen load significantly before spraying begins. Prune severely infected fronds using sterilized shears and dispose of debris outside. Never compost diseased material since spores survive decomposition and reinfect future plantings.
Horticultural oils carry phytotoxicity risks that vary by fern genus. Test on a single frond and wait forty-eight hours before full application. Thin-bladed species like maidenhair tolerate lower concentrations than leathery types such as bird’s nest ferns.
Monitor treated plants weekly for three cycles minimum. Pests rebound quickly if survivors reproduce unchecked between applications. Document progress with photos to distinguish genuine improvement from temporary suppression that masks underlying problems.
Quarantine protocols protect your broader collection during active treatment periods. Keep affected ferns isolated until two consecutive inspections show no new symptoms. This buffer period prevents accidental spread through shared tools, water splash, or casual handling.
Common Mistakes That Damage Ferns During Diagnosis
Misreading sori as disease leads to unnecessary pesticide exposure that weakens otherwise healthy plants. Chemical residues accumulate on delicate fronds and disrupt beneficial microbial communities. This stress makes ferns more vulnerable to actual problems later despite solving nothing initially.
Overwatering frequently follows false assumptions about drought stress causing spotting. Owners see discoloration and assume the plant needs hydration when moisture isn’t the issue. Soggy soil then invites root rot that compounds whatever original concern prompted the reaction.
Aggressive wiping during the rub test can physically damage epidermal layers. Pressing too hard bruises tissue and creates entry points for secondary infections. Gentle pressure is sufficient to distinguish embedded structures from surface contaminants without harming the specimen.
Ignoring seasonal timing causes misdiagnosis during normal reproductive phases. Many ferns produce sori only in late summer or autumn regardless of care conditions. Treating these expected developments as emergencies wastes resources and stresses plants unnecessarily.
Using broad-spectrum fungicides preemptively harms symbiotic relationships ferns depend on. Mycorrhizal associations support nutrient uptake and disease resistance in ways synthetic chemicals disrupt. Targeted interventions based on confirmed diagnosis preserve these invisible support systems better than blanket prevention.
Skipping quarantine after identifying pests allows rapid colonization of nearby specimens. Scale crawlers migrate easily through air currents or shared watering equipment. Isolation seems excessive until you realize one overlooked female can restart an entire infestation within weeks.
Assuming all black dots share identical causes ignores genus-specific morphology. Asplenium sori differ dramatically from Dryopteris arrangements in shape and position. Learning your particular fern’s normal appearance prevents future confusion and builds confidence in routine care decisions.
Frequently Asked Questions About Fern Leaf Spots
Should I remove fronds with black dots?
Only prune if the spots are confirmed pests or fungal infections causing decline. Healthy sori indicate reproductive maturity and should remain untouched to complete natural cycles. Removing fertile fronds unnecessarily reduces spore production and stresses the plant without providing any benefit.
Sterilize shears between cuts to prevent spreading pathogens to healthy tissue.
Do black dots mean my fern is dying?
Uniform rows of dry dots on mature fronds signal active reproduction rather than distress. Dying ferns show yellowing, wilting, or browning tips alongside spotting instead of isolated marks. Check soil moisture and light levels if overall vigor declines despite normal sori development.
Pathological spots spread rapidly while healthy ones remain stable for weeks.
Can I wipe off healthy fern spores?
Gentle wiping won’t harm embedded sori but serves no practical purpose for plant health. Excessive rubbing damages delicate epidermal layers and creates infection entry points. Leave reproductive structures intact unless diagnosing pests through the rub test described earlier.
Spores release naturally when mature without human intervention or cleaning assistance.
Why do only some fronds have black dots?
Ferns produce sori exclusively on mature fertile fronds as part of their life cycle. New growth lacks reproductive structures until reaching developmental maturity over several months. Environmental factors like light intensity and seasonal timing also influence sporulation patterns across individual plants.
This variation is completely normal and reflects healthy physiological differentiation.
Are black dots contagious to other houseplants?
Sori pose zero risk to neighboring plants since they’re species-specific reproductive organs. Scale insects and fungal pathogens spread readily through air currents or shared watering tools however. Quarantine any fern showing smearable or irregular spots until diagnosis confirms safety.
Isolation protects your collection while you determine whether treatment is necessary.

Similar Posts